Hi everyone,
recently I had the same problem with failing/flickering turn lights on my F22. Since I did not see any correlations to bad weather or bad connections on the outside of the lights, I went for a brutal approach and actually cut open the whole housing.
I know I could have also heat the assembly and try to remove the cover glass. However, it seemed quite fragile to me and all edges are visible, allowing no room to hide cracked edges. Headlight cover glasses go on ali express for 30$ but tail lights are more like 80$ per piece. So I made my decision to go for the rear side.
The first one I cut open way too much, since I had no idea how the inside might look like.
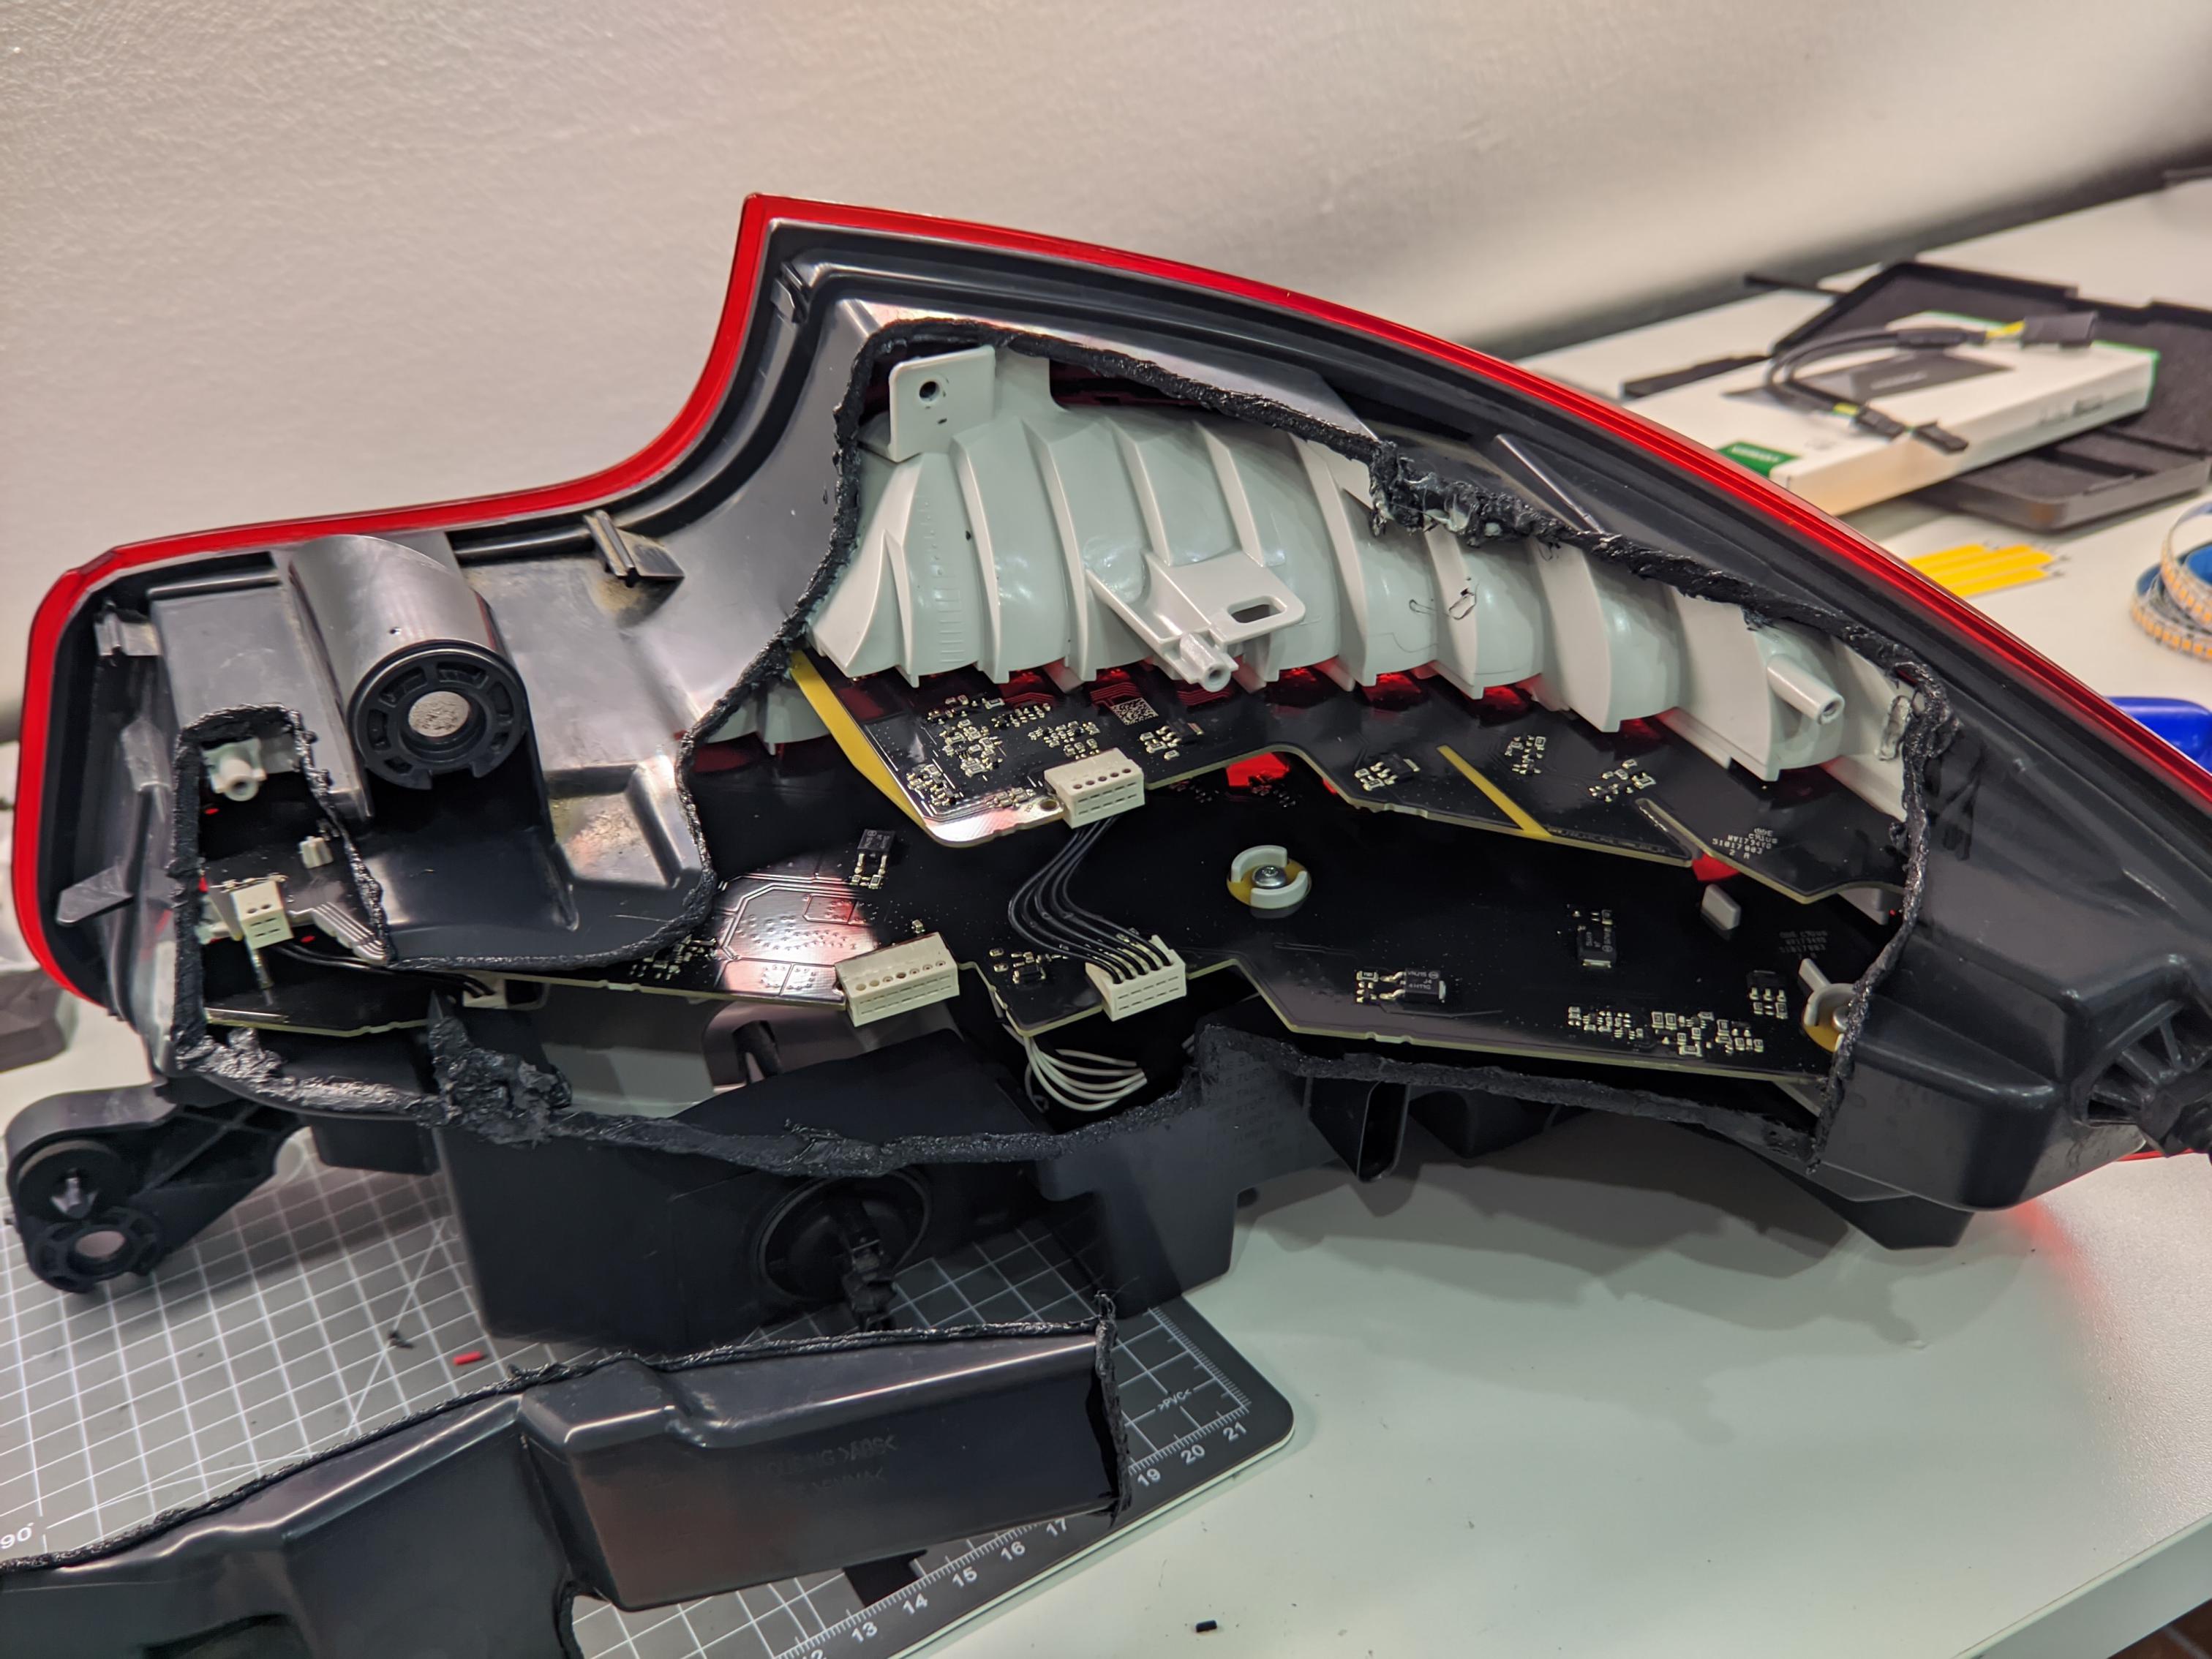
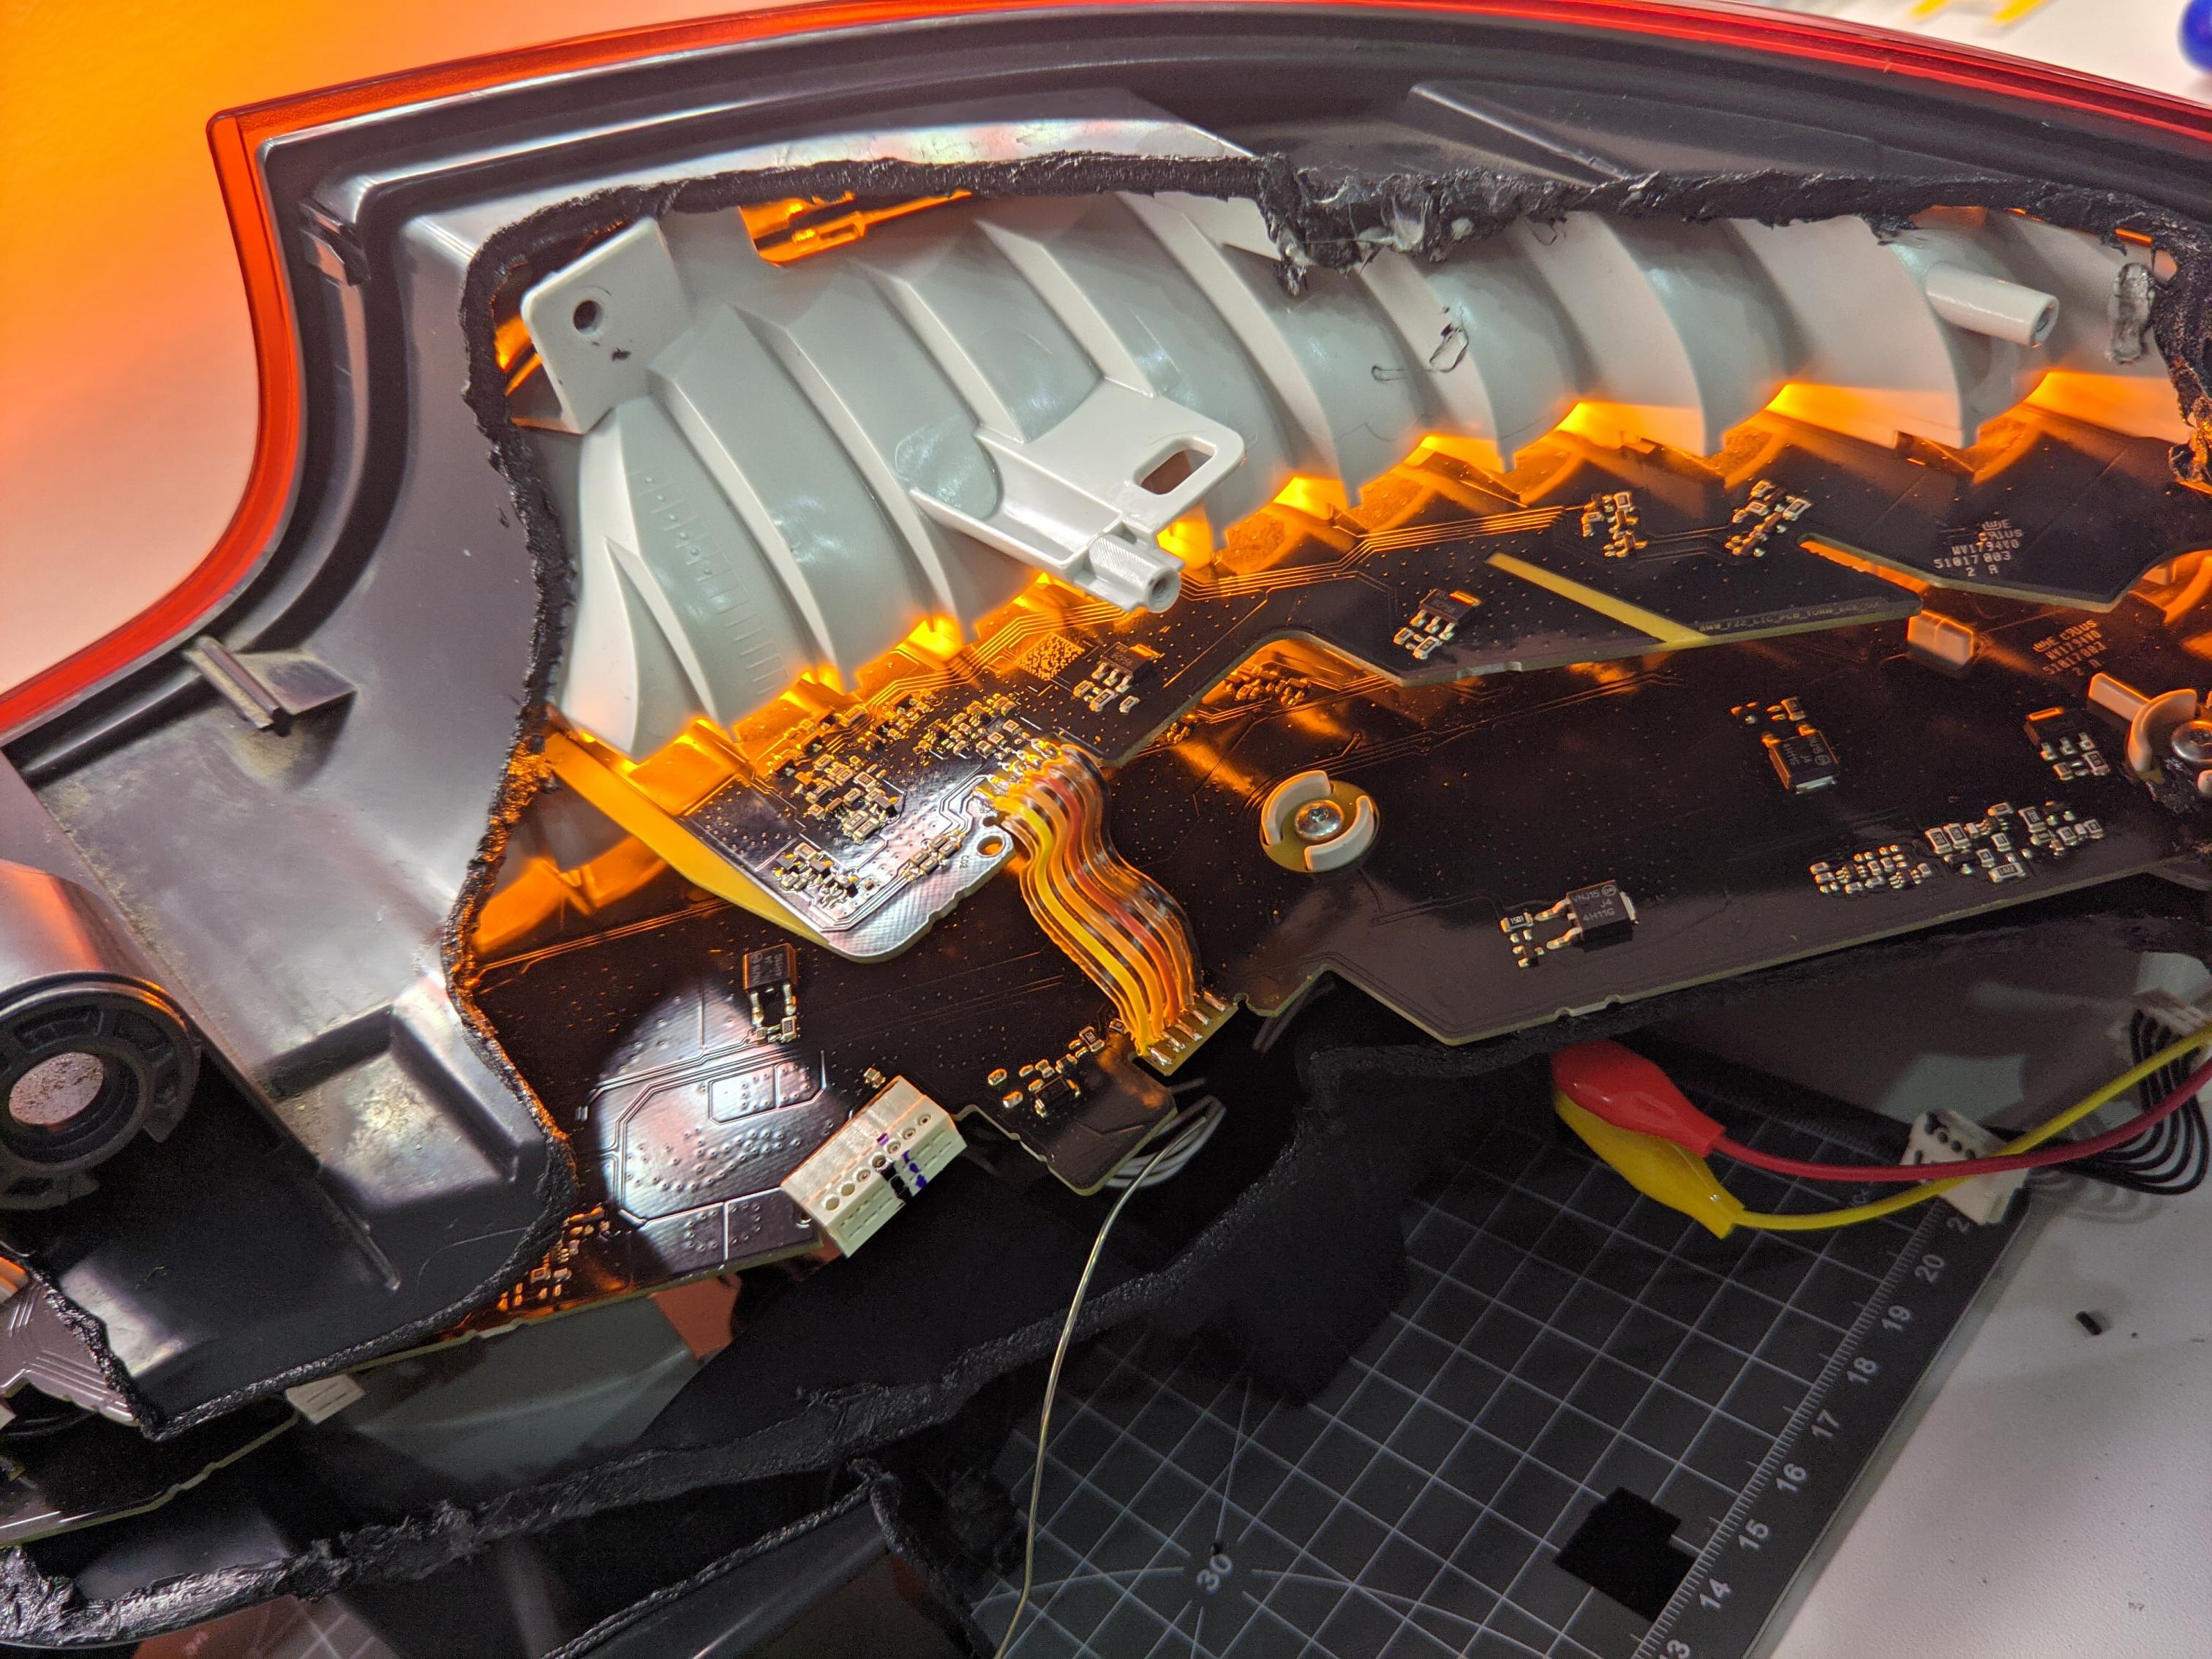
As you see the relevant area is concentrated at about 1:3 from the left. The focus lies on that two PCB connectors. The more left on is the main connector, it comes from the socket with the outside connections.

The turn signal spans over both main PCBs, however the LED drive must be located on the top PCB. The double connector feeds 12V from the bottom PCB to the top PCB. The other cables transport something around 3V back to the lower PCB (maybe from a constant current source or some voltage to control transistors/mosfets).
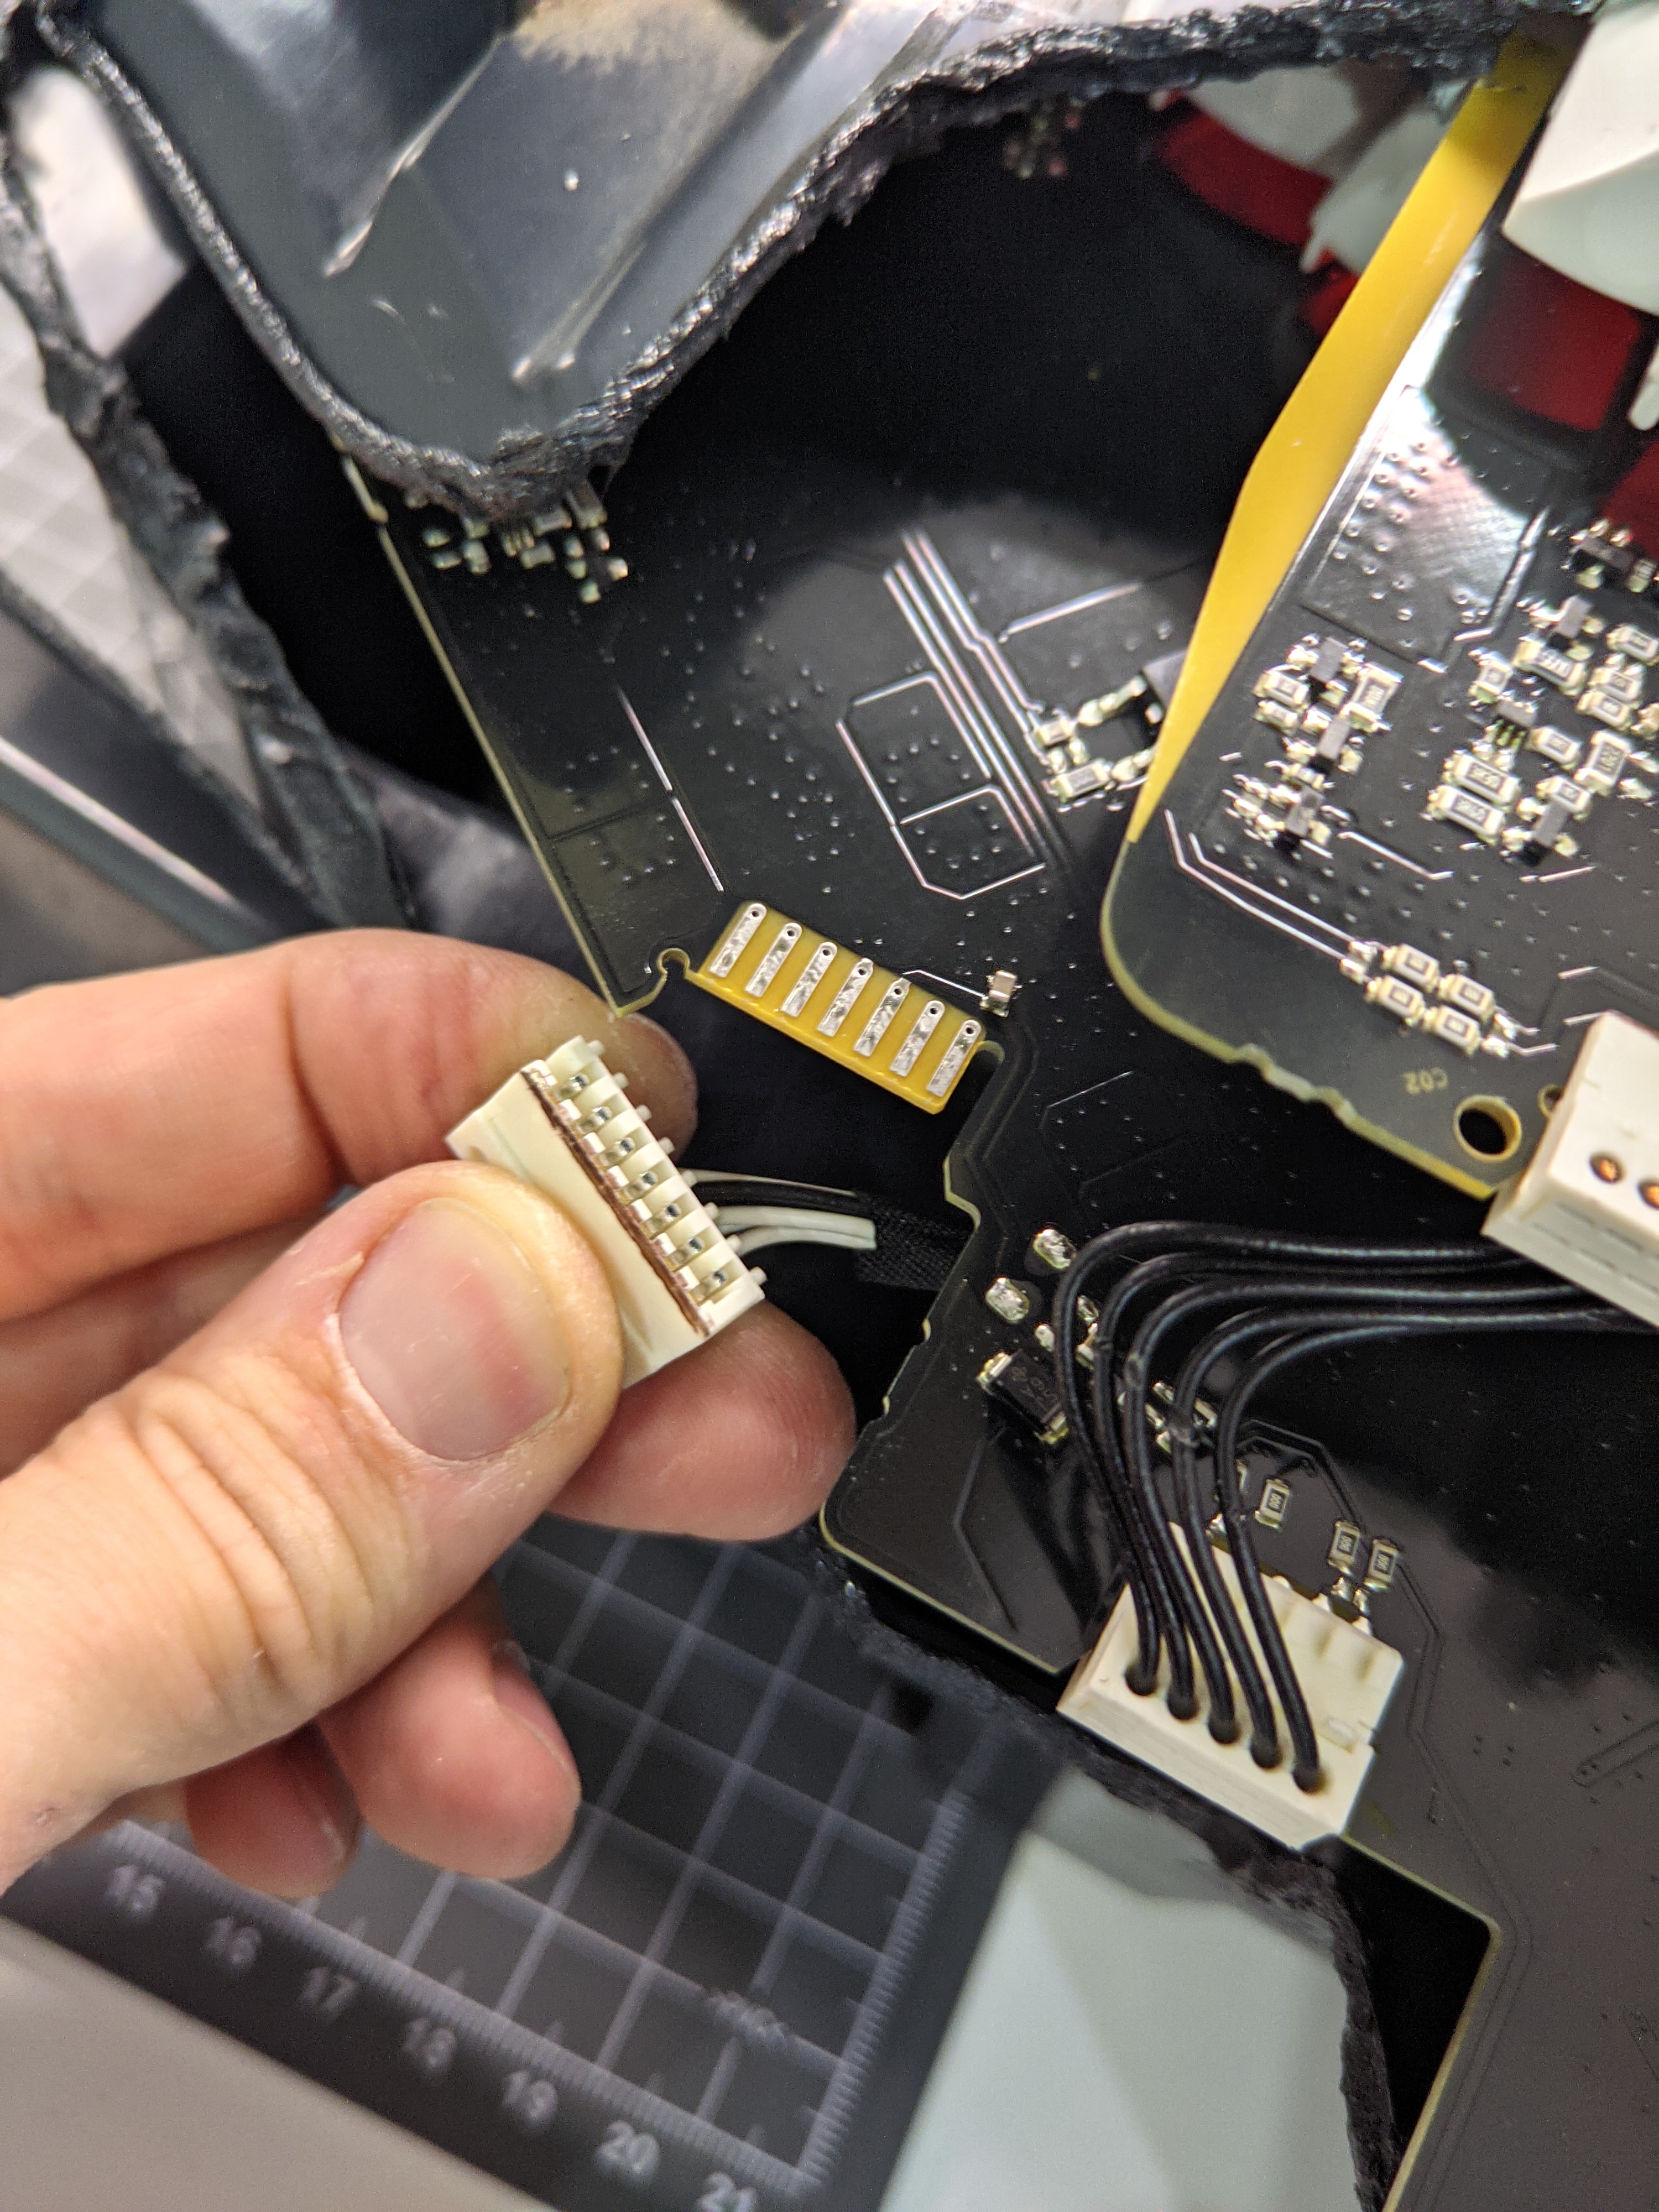
If the connector is removed both parts of the turn signal are off. Luckily I had the flickering error even after gently removing one tail light from the car and still after cutting it open. With the turn lights were on (dim, flickering) I was pulling a bit on that connector and suddenly they became bright and flicker free again. Therefore - at least in my case - I am pretty sure that this is the cause of the issue. As a fix, I made a soldered connection and also added some solder on the main connector pads to make it sit more tight.
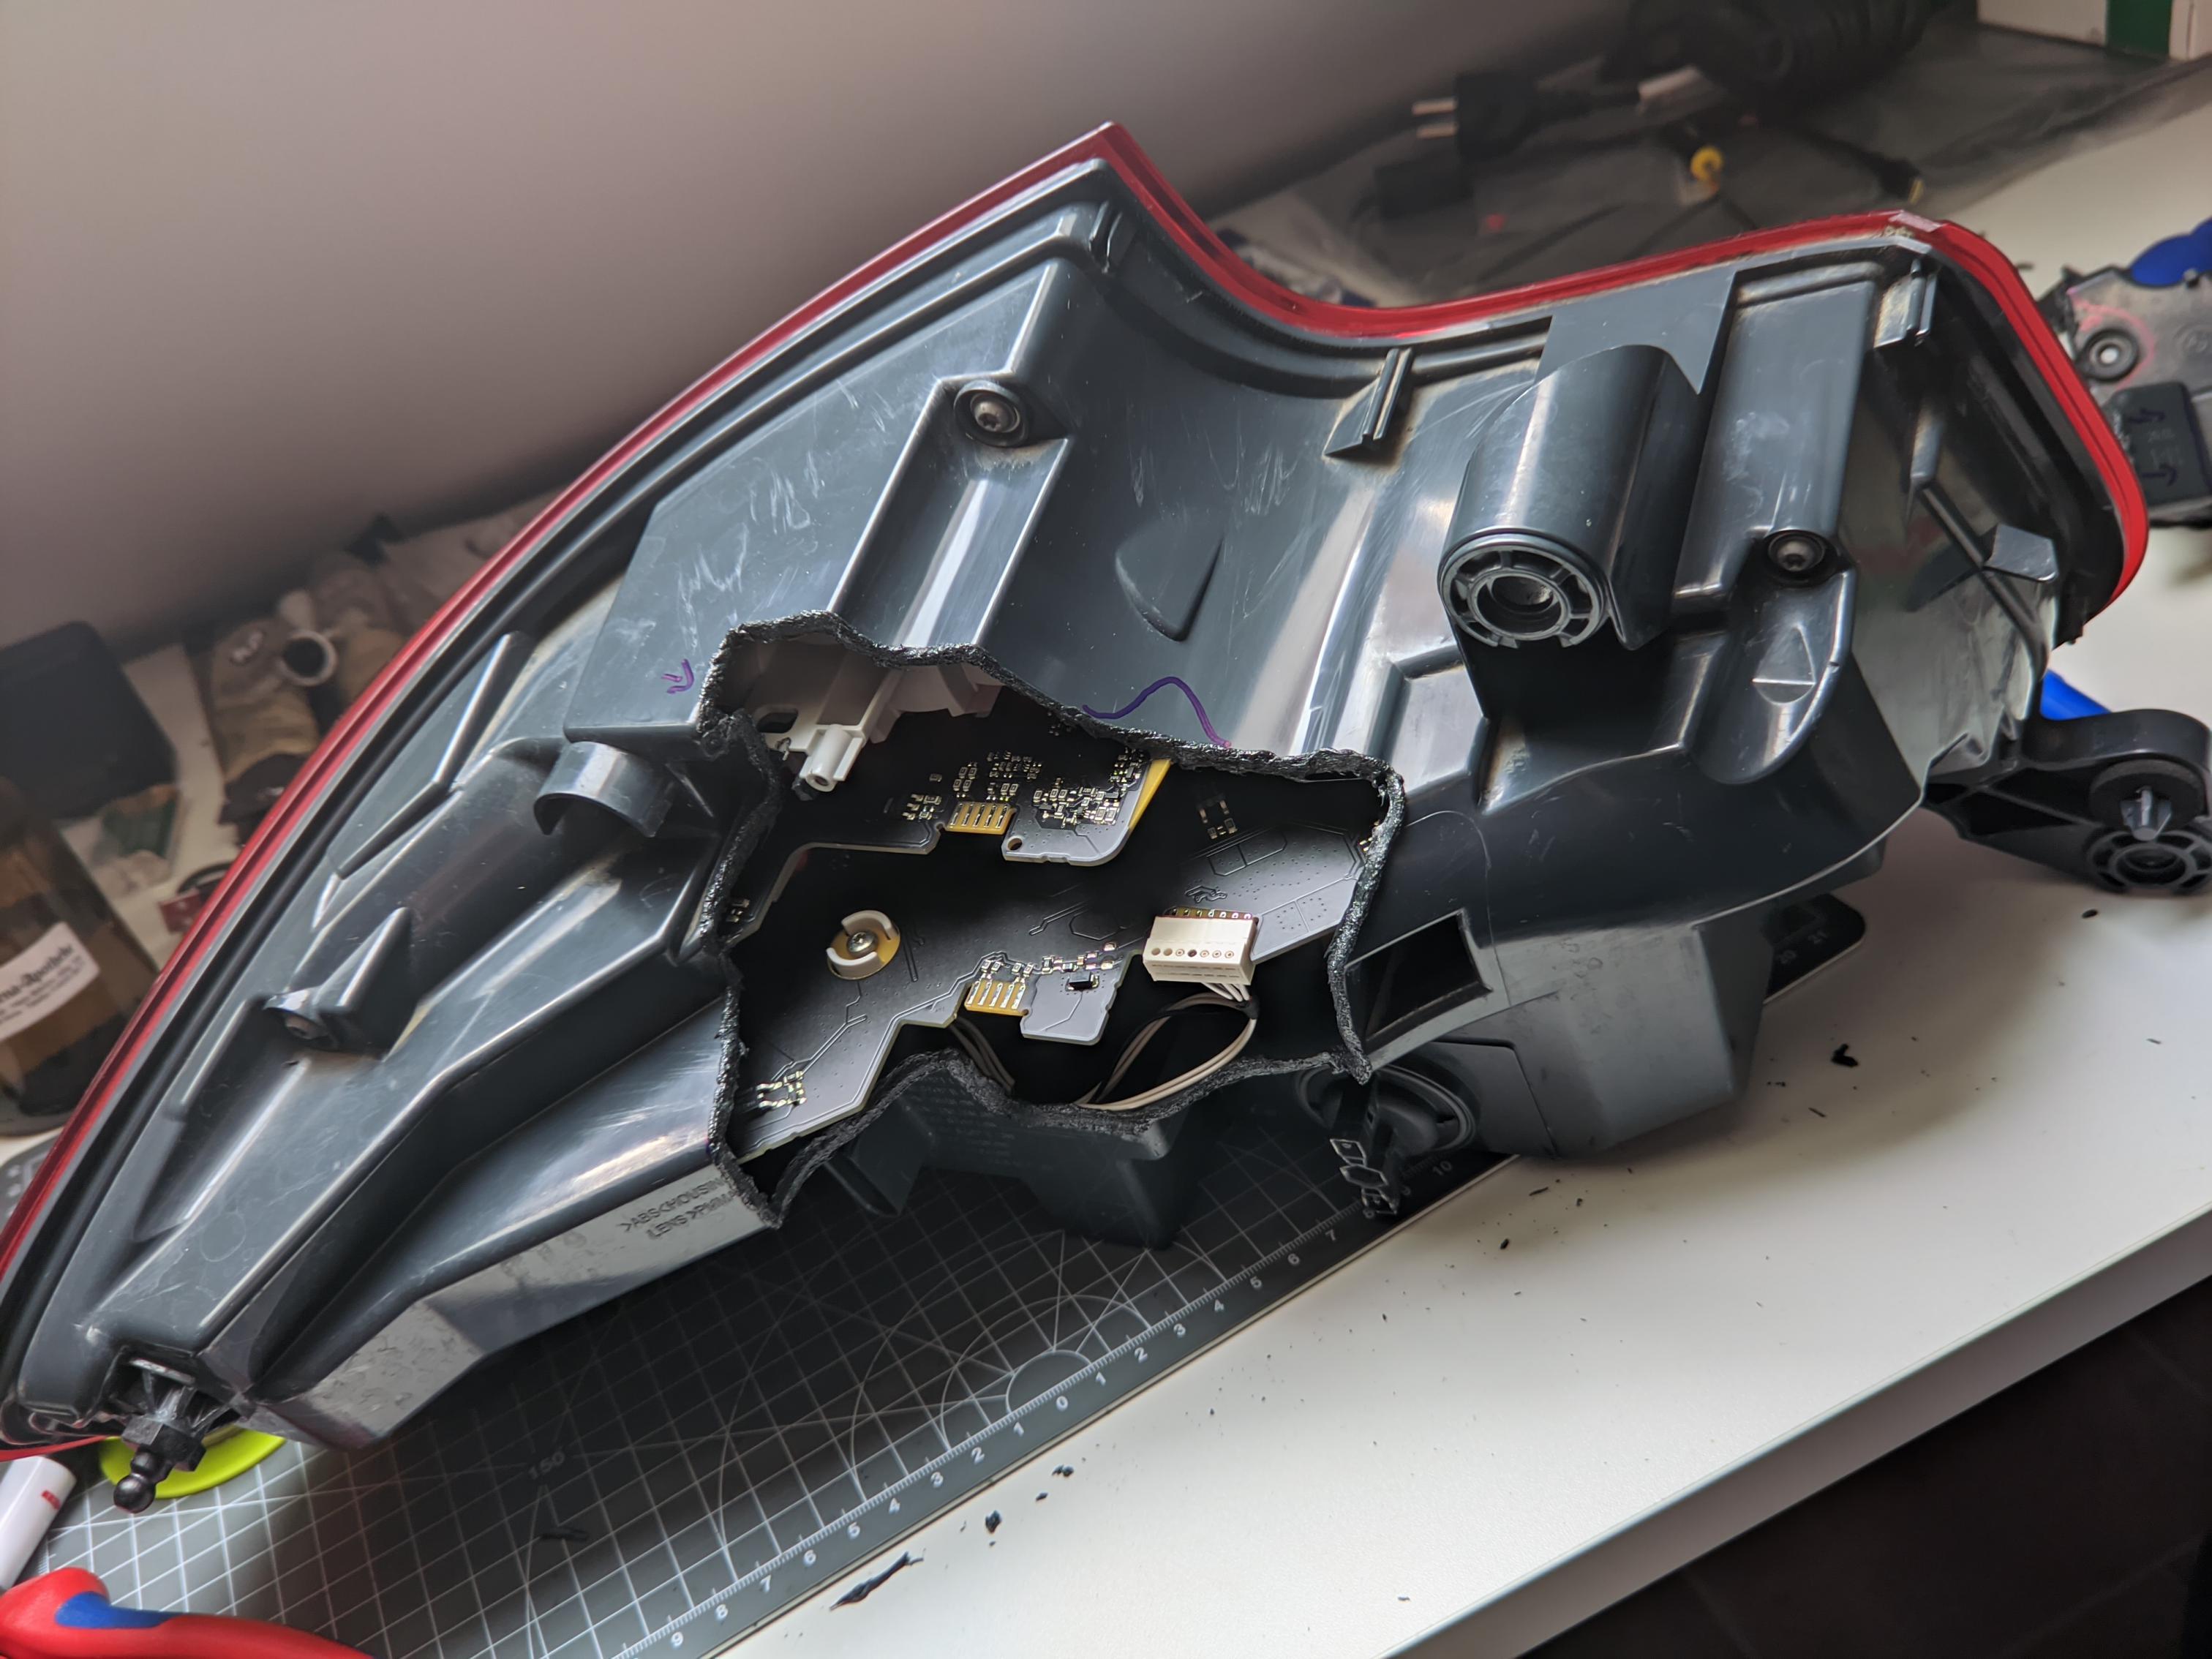
For the other side I repeated this procedure, however I was able to reduce the cut out area a lot. I recommend using a hot cutting blade since you might touch the PCB (on the left edge in the picture). The blade did not harm it as long as you frequently check and work with caution. With a dremel tool the cut might be more clean but it also might cut the PCB easily.
Sealing them off again was quite some fun with ABS welding, but so far my turn lights work well again.