| 02-07-2022, 02:05 PM | #23 | |
|
Major
 
739
Rep 1,066
Posts |
Quote:
But to answer your question, I picked up an M2c. Added Ohlins, Cage, Harnesses and racing shells and it's a fun toy.
__________________
Formerly - "That Guy" in the purple BMW
Last edited by tke743; 02-07-2022 at 02:10 PM.. |
|
|
Appreciate
3
|
| 02-10-2022, 07:53 PM | #24 |
|
This hobby is expensive!
134
Rep 72
Posts |
Emergency Preparedness, Part 1
Always plan for the unexpected when on road trips.
Not wanting to rely on the mobility kit alone, I got a spare tire. I checked fitment front and rear and it clears the calipers with no problem. The wheel came with two centering rings; I left one on the wheel and the other in my tool bag. I put the bag under the wheel and both fit under the net. I have a jack also, that I'll fit in there to finish it out. |
|
Appreciate
1
W///7494.00 |
| 02-10-2022, 08:17 PM | #25 |
|
This hobby is expensive!
134
Rep 72
Posts |
Emergency Preparedness, Part 2
Ever ordered car parts and in order to get free shipping you need just a few $, but don't want to add more than the cost of the shipping you're trying to avoid?
This safety hammer was one of those cart add-on's. I think it's a good tool to have in case you're trapped in the car. I hope I never need to use it for its intended purpose: breaking glass on one end and cutting seatbelts on the other. Clears the phone no problem and even glows in case you need to find it at night. Not a flashy mod, I know  |
|
Appreciate
1
gphung193.50 |
| 02-12-2022, 11:57 AM | #26 | |
|
First Lieutenant
 
194
Rep 309
Posts
Drives: 2018 M2 LBB - 6MT
Join Date: Jan 2019
Location: Toronto
|
Quote:
|
|
|
Appreciate
0
|
| 02-12-2022, 07:08 PM | #27 | |
|
This hobby is expensive!
134
Rep 72
Posts |
Quote:
I had to dig in my parts bin to get self tapping screws with heads small enough to seat properly while also being long enough to bite in. The point is... it doesn't come with screws, so plan for that for those who buy one. https://www.fcpeuro.com/products/saf...mmer-cta-10600 |
|
|
Appreciate
1
gphung193.50 |
| 03-09-2022, 02:55 PM | #28 |
|
This hobby is expensive!
134
Rep 72
Posts |
Improving Driver Skill Using Data
Back in post #8, I outlined my personal short list for achieving maximum driver fun. Despite a lot of things still on backorder, I'm making progress. So I wanted to share a sneak peek of an upcoming upgrade towards item #3 ("Improve Driver Skill").
I'll share pics of the install in the next few weeks (once I receive cables and the second camera) including a slick location for mounting the brain. Hopefully it's useful for others. Very exciting. |
|
Appreciate
0
|
| 03-20-2022, 09:35 PM | #29 |
|
This hobby is expensive!
134
Rep 72
Posts |
RaceLogic VBOX Install
Not a lot of install content for these for us non-professionals, so I hope my posts are helpful to someone.
After figuring out where I wanted to mount all the components and getting cables of the right length, I began at the front of the car. The OLED display doesn't come with any mounting hardware, but does have a very convenient 1/4" thread that I'll use to attach a cold shoe mount so that I can quickly swap between my radar locator and the display. Next, I started to run the OLED cable through the between rear view mirror shroud and the headrest and over to the passenger A pillar. I routed it and camera #1 cable on the topside of the existing harness (away from the side curtain airbag), added a few zip ties and ran them down to the kick panel. I wrapped the cables with OE fabric wrap until they reached this area to avoid any noises later on. The third cable to run from the passenger kick panel to the trunk is the CAN cable. I needed a 5m cable The cable part number has different wiring colors compared to the standard cable: Car Harness ---- Signal ID ---- VBOX Cable Harness Blue/Red ---------CAN High---- Orange Red ----------------CAN Low----- Green The photo with the captions is from an M4, but it's similar for my M2C. For those who are intimidated by tapping in the CAN bus, it's just a data path that the VBOX will listen to. A good analogy: think of CAN as a trade show floor; some discussions are very important and command a stage & attention, others are just informational and others are important, but only for a limited audience. For the VBOX, it'll 'listen' to the Powertrain CAN (PT_CAN) "discussions." For more information on the CAN protocol, I've attached an app note to explain it more thoroughly. Anyway...with the CAN wires, I stripped them back and connected the cables as above. I used the standard solder and 3M Temp Flex cold weather electrical tape....nothing special. Later this week, I'll continue to run the cables to the trunk and then get power and GPS antenna run them back also. Last edited by ndyvidual; 04-07-2022 at 09:24 PM.. |
|
Appreciate
0
|
| 03-22-2022, 02:47 PM | #30 |
|
This hobby is expensive!
134
Rep 72
Posts |
Question: Does anyone know of a good place to get about 3A of switched +12v from the rear of the car? I'm thinking of tapping into the turn on lead for the amplifier in the driver side trunk corner, but wanted to ask first.
|
|
Appreciate
0
|
| 03-22-2022, 03:32 PM | #31 |
|
This hobby is expensive!
134
Rep 72
Posts |
Second question: What is this pack under the carpet on the passenger side along the sill area of the door? It feels like a battery pack. Has a line in plastic flex loom that goes up the B pillar....
|
|
Appreciate
0
|
| 03-22-2022, 06:33 PM | #32 | |
|
Private First Class

203
Rep 166
Posts |
Quote:
 appears to be LoJack appears to be LoJack |
|
|
Appreciate
0
|
| 04-01-2022, 05:19 PM | #33 |
|
This hobby is expensive!
134
Rep 72
Posts |
Making progress with the Racelogic install. I made brackets to mount the logger in the trunk using existing holes (using threaded clips).
After a lot of auditions, I found a productive viewpoint for the second camera so it can captures my hands clearly. |
|
Appreciate
1
dtmurf481.50 |
| 04-05-2022, 03:23 PM | #34 |
|
This hobby is expensive!
134
Rep 72
Posts |
The display and radar are easy to swap on the same mount (which is bonded to the windshield).
Last edited by ndyvidual; 04-05-2022 at 06:46 PM.. Reason: Clarification. |
|
Appreciate
0
|
| 04-05-2022, 03:27 PM | #35 |
|
This hobby is expensive!
134
Rep 72
Posts |
Still working on that brake CAN channel data, but the camera angles are fine. I'll spend the next few weeks testing with a track I created on Google Earth and make sure things are working as intended before I get into the next project on my list.
|
|
Appreciate
1
dtmurf481.50 |
| 04-26-2022, 02:19 PM | #39 |
|
This hobby is expensive!
134
Rep 72
Posts |
Spring Yard Cleaning
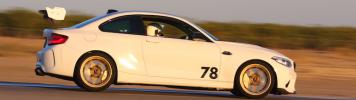
While I'm tweaking my Racelogic scene and waiting for parts, I did some yard work and a resulting run to the town compost lot.
Nothing my trusty Toyota Tacoma, er....sorry...... M2 can't handle And while I was out, a quick test fit for my new track trailer, custom powdered in one of my favorite car colors: Audi R8 grey! |
|
Appreciate
1
dtmurf481.50 |
| 05-06-2022, 03:39 PM | #40 |
|
Private

31
Rep 52
Posts
Drives: 2021 M2 Comp
Join Date: May 2022
Location: Virginia Beach
|
Awesome to see how utilitarian the M2 can be! Great build!
|
|
Appreciate
0
|
| 05-21-2022, 07:33 PM | #41 |
|
This hobby is expensive!
134
Rep 72
Posts |
TC Kline Double Adjustable Suspension Install
One of the final major modifications I identified last season (and while street driving) was the need for a more versatile and comfortable suspension. So before my first track event, I tackled my coilover install. My E46 M3 has TCK's single adjustable set and I liked them (and put a ton of miles on them), but needed rebound control as highlighted while going over Lime Rock's hill under throttle.
FaRKle! and Mosely already made great content for DIY's for the install. The Mosely's thread was useful re-indexing bolts: https://f87.bimmerpost.com/forums/sh....php?t=1595398 Here's the quick version of what I did: Installed Fall Line mono-ball front thrust bearings Installed Fall Line adjustable sway bar links, front and rear. Installed TC Kline double adjustable suspension Alignment and corner balanced at one of my local shops. |
|
Appreciate
0
|
| 05-21-2022, 07:55 PM | #42 |
|
This hobby is expensive!
134
Rep 72
Posts |
TC Kline Double Adjustable Suspension Install
A combination of a Snap-On Master ball joint kit and a Harbor Freight front wheel driver adapter cup kit was needed to get the original bushings out.
The new bolt is much longer than the old one FYI; it does fit though. To get these in and out, you have to pinch your side coolant hoses quite a bit. But no leaks fortunately. The bushings need to be pressed out of course, but the Fall Line bearing slid into place with no problem, which seemed not the case with the content I found on the web..which was not very plentiful. Anyway, I forged on. Once in the arm, I applied medium thread lock prior to assembly, tightened the plate screws and added witness marks. They were very secure then and have been noise free since installation. No way to determine a noticeable difference since I swapped suspension at the same time. The bolt in the knuckle got replaced also and is also slightly redesigned; most notably that it's now a nylon lock nut. |
|
Appreciate
0
|
| 05-21-2022, 08:18 PM | #43 |
|
This hobby is expensive!
134
Rep 72
Posts |
With the bearings in, I started with the install of the coilovers.
Some notes that aren't in any content I've seen: The Autozone pass through set is great for the rear mount disassembly with that 18mm nut, thanks FaRKle! . But ASSEMBLING the the TC Kline damper required the supplied 19mm top nut to exist in the top of that mount and there's physically no way that Autozone set will work as-is. So I used my OTC pass through set I got from FCP years ago and took a grinder to the 19mm socket to thin its walls so it will slide in. The 11mm socket passes through no problem. Moving on the the front, you'll quickly find that the aluminum brace covers access to the camber bolts, so as-is, you won't be able to adjust camber at the track. So a saw to the brace fixes that no problem. Lastly, re-indexing bolts: that DIY is correct, but didn't give a clear example of how to load a corner for final tightening, while being able to actually get to the nuts and/or bolts in question. My solution: my quickjack + a jack to lift the corner up to the new ride height. |
|
Appreciate
0
|
| 05-21-2022, 08:45 PM | #44 |
|
This hobby is expensive!
134
Rep 72
Posts |
And new street wheels...
The stars aligned shortly after buying this car because I wanted better street wheels. My needs were as follows:
-Strong -Allows easy inspection of braking components -Easy to clean -Spacer-free fitment while allowing wide widths for a mature, well through out look. -Attractive. The new Apex Sprint VS's met all of my needs. I used them at the track with a staggered set of Michelin 4S's and they were a blast. 265 fronts, 295 rears and I have great clearance with the TC Kline's. Pressure wise, the sweet spot for me was 31psi hot. Anything more and they felt greasy and I had to be delicate with....well all inputs, haha. At Palmer, one developed a slow leak though. After some laps, TPMS had temp/pressure rising on three, but one was rising in temp, but dropping pressure. So I switched to my Nankang 200TW on the SM-10 squares and also had to drive home on them. Root cause: loose valve stem. Tightened it up (they are SAE sized unfortunately) and checked all of the others and pressure is now stable. I run TPMS on my track set also to allow detection of issues just like this. This and other tracks have long sweeping combination corners where you load one side up for a long time and I never want a sidewall to collaspe and allow the wheel to make ground contact due to lack of pressure. Especially since I'm running 30 series tires. Overall, I'm very pleased with these wheels. They are LIGHT and I love their look over everything else I've considered for this body design. With Apex's pre and post sale support, they were my ideal choice for street use. Thanks Expert@ApexRaceParts for the Winter group buy for the community. Lastly, the photo you see is the VS's on my new trailer (also on coilovers) and my track SM-10's on the car. Both sets are anthracite. I chose the stronger wheels for the street (both are strong though), because public streets are simply more abusive than a racetrack on wheels in my experience. So with the long road trips I do between US east coast and into Canada, I need this car and its aftermarket components to be up for the environment. My E46 M3 was sold with almost 1/4 million miles on it. I plan to repeat that with this car. |
|
Appreciate
2
thegrinchboy62.00 W///7494.00 |
Post Reply |
| Bookmarks |
|
|