| 04-27-2016, 02:45 PM | #1 |

1767
Rep 7,651
Posts |
IND | F87 M2 Full Side Grille DIY
Many of you have probably already seen the DIY for the BMW M Performance side grilles. This one is for those who plan to purchase the IND painted side grilles with a different color base plate.
Available here: http://ind-distribution.com/ind/bran...ide-marker-set Tools required: Bondo Spreader (Optional) Nylon Pry tool Painters tape Step 1: Put down a layer of painters tape surrounding the grille to protect the paint. Step 2: Remove the horizontal M2 badged grille by prying it off with the nylon pry tool. Step 3: Work the bondo spreader or nylon pry tool around the side grille to release the double sided tape. Step 4: Remove the side grille and clean any excess double sided tape. Step 5: Peel the backing tape off the new painted side grille. Step 6: Press the new side grille in place firmly to ensure a good bond with the double sided tape. Step 7: Peel off the painters tape and admire your work. 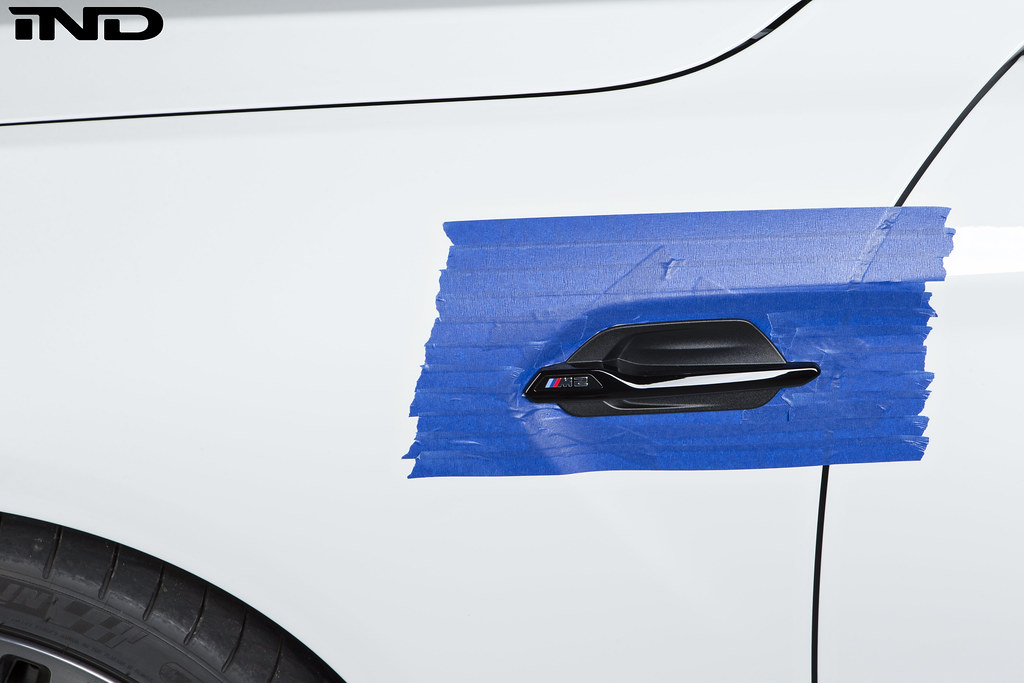 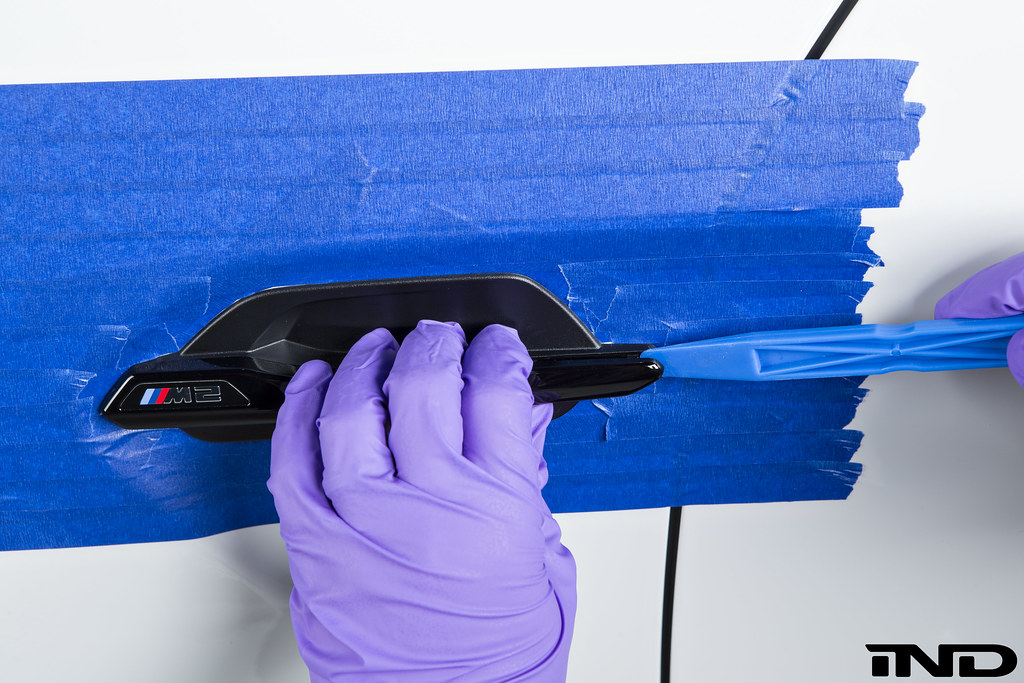 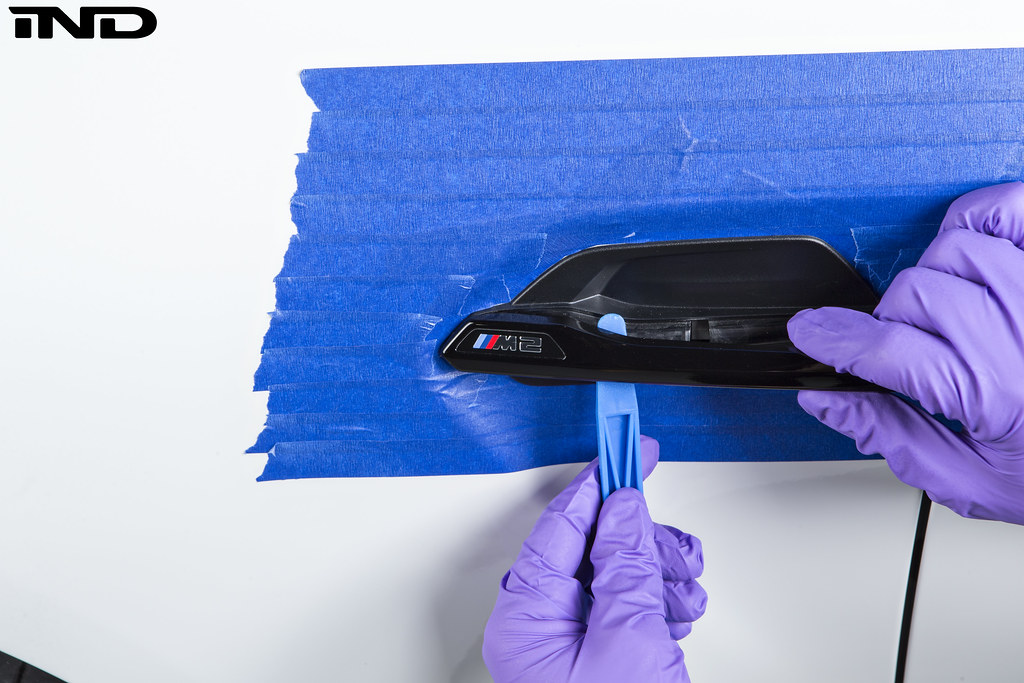   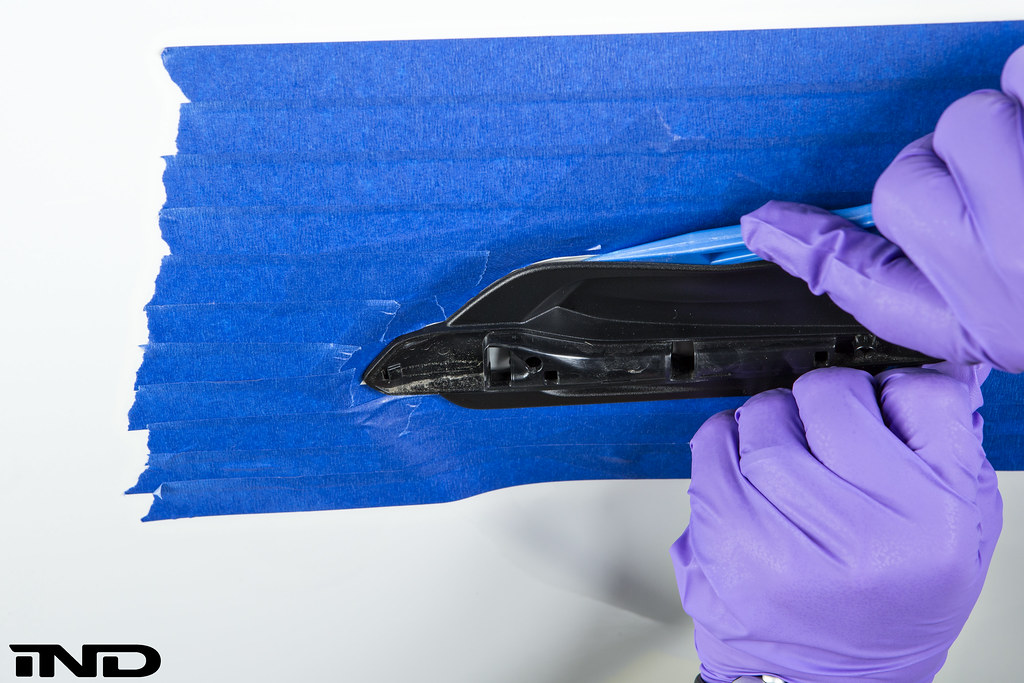 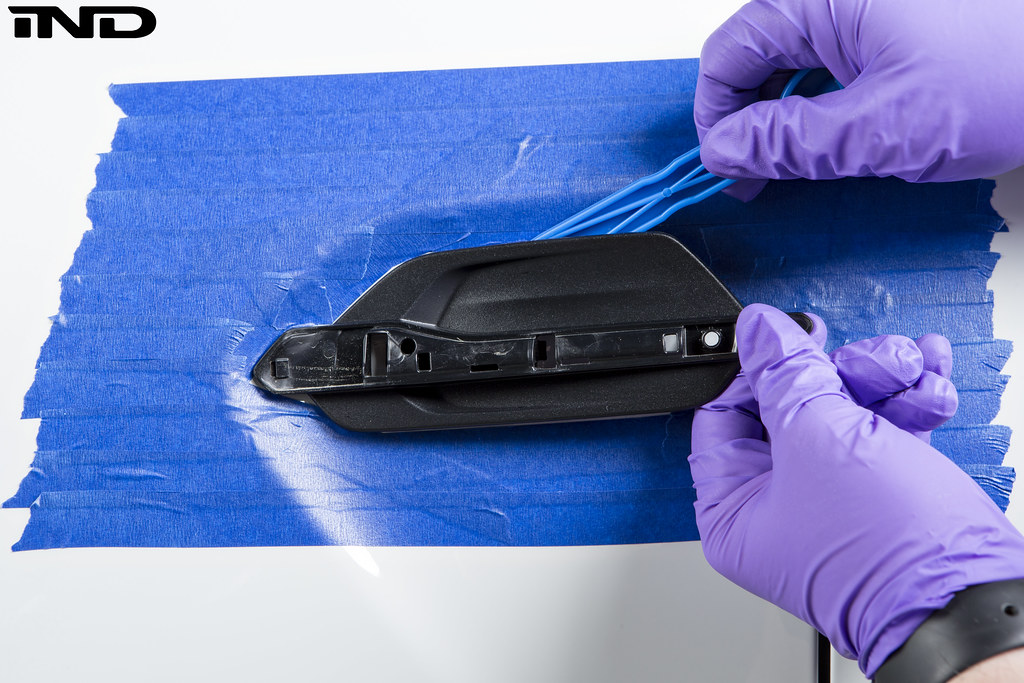 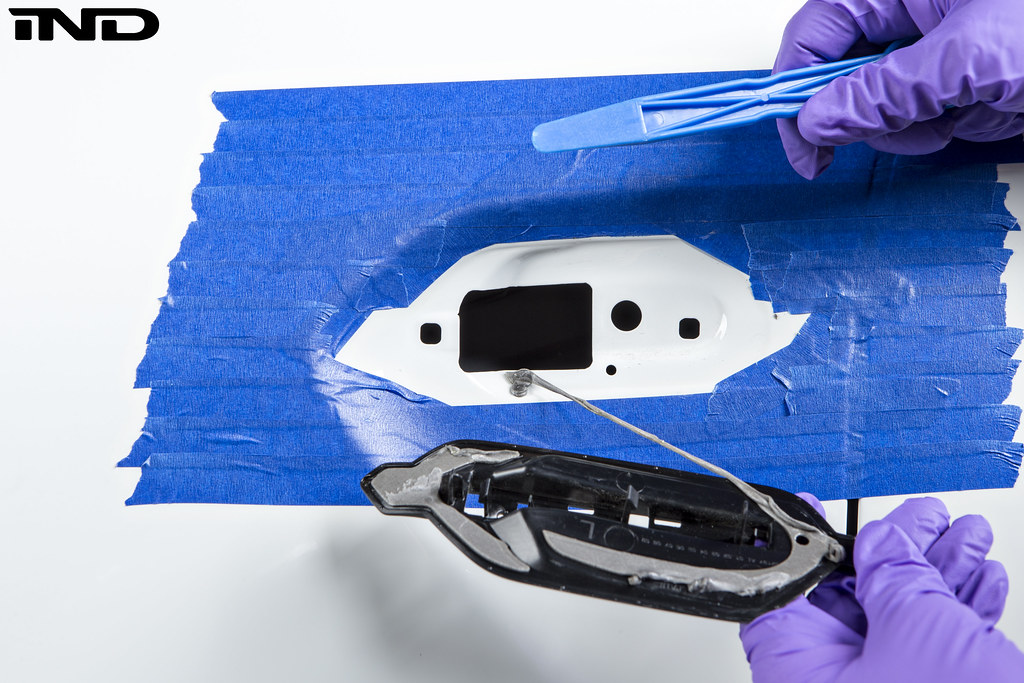 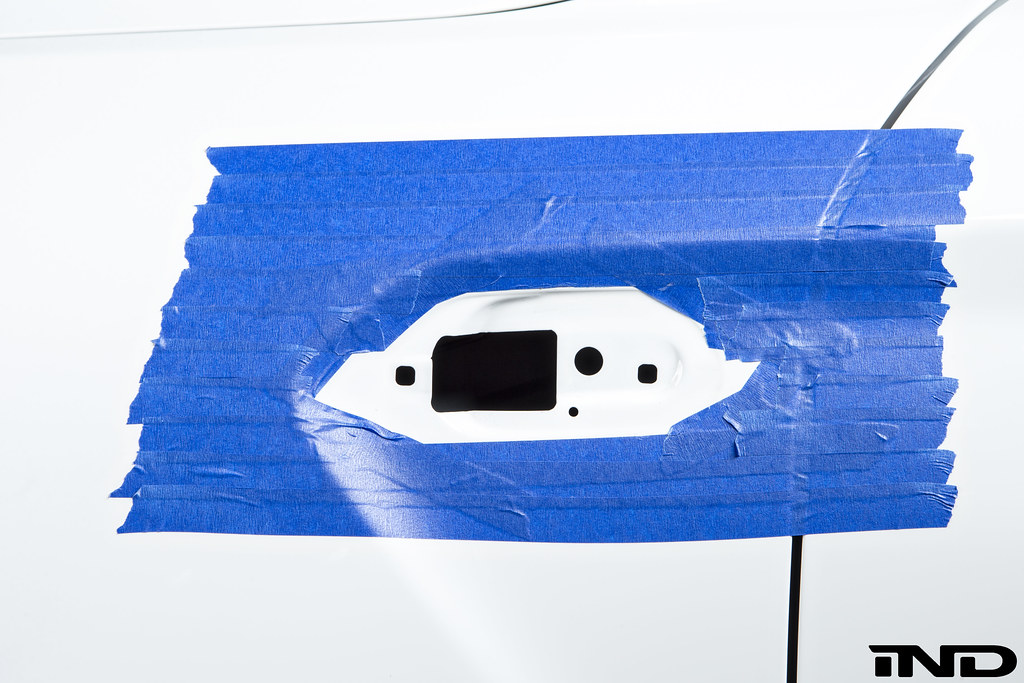 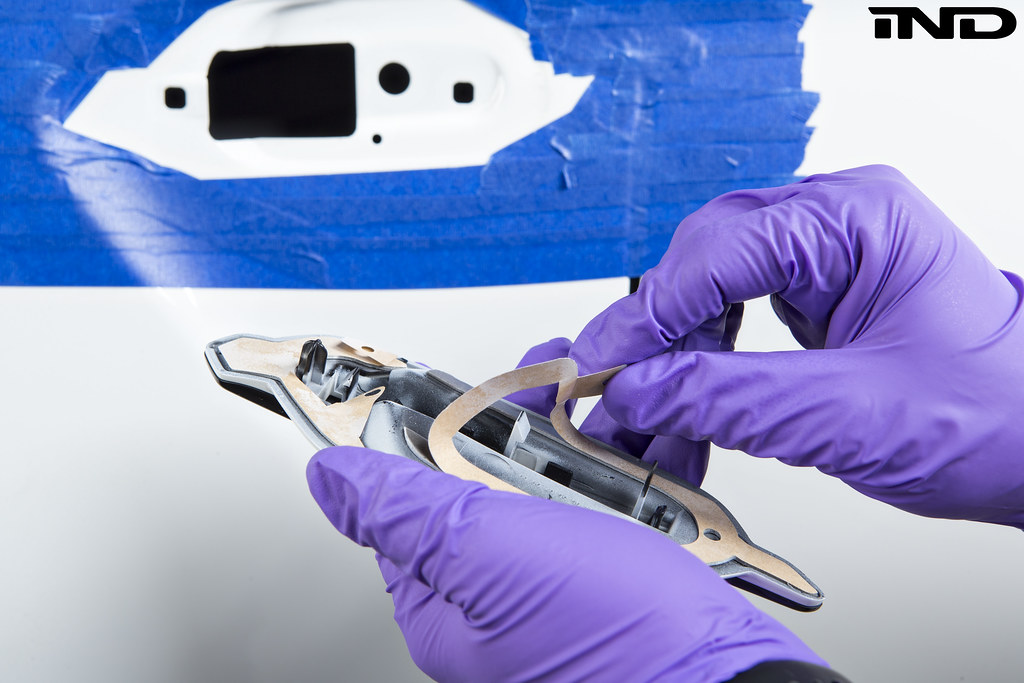 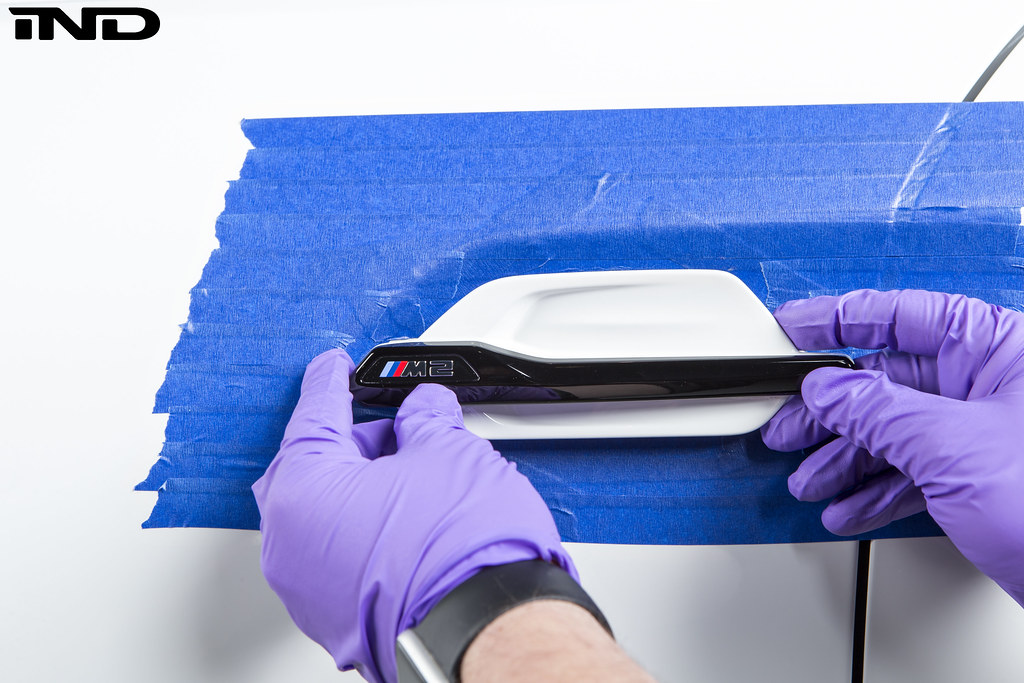 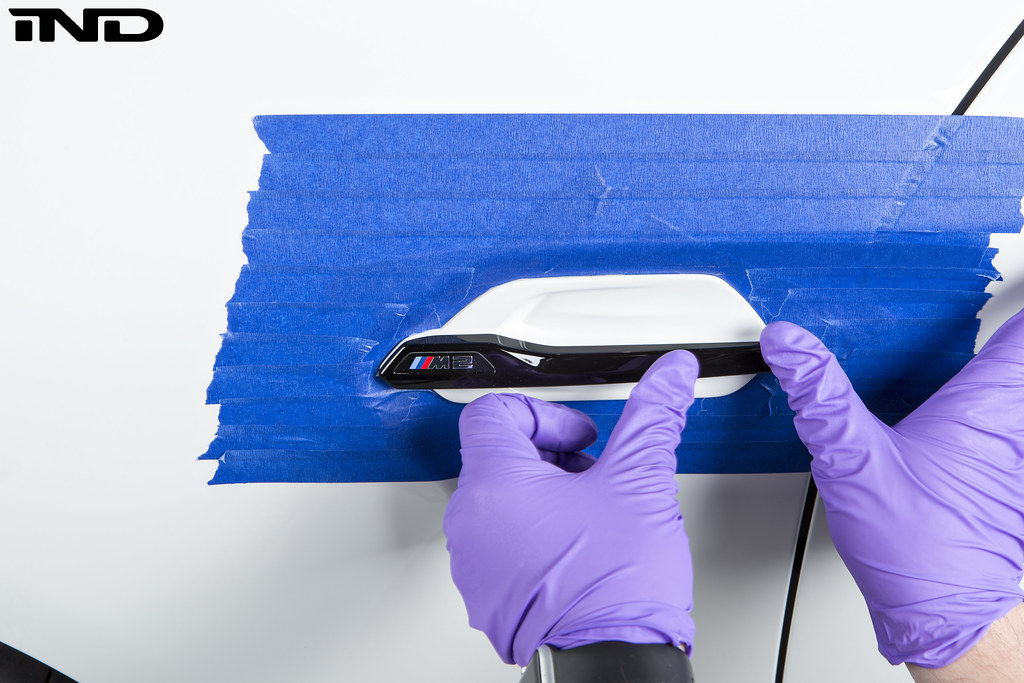 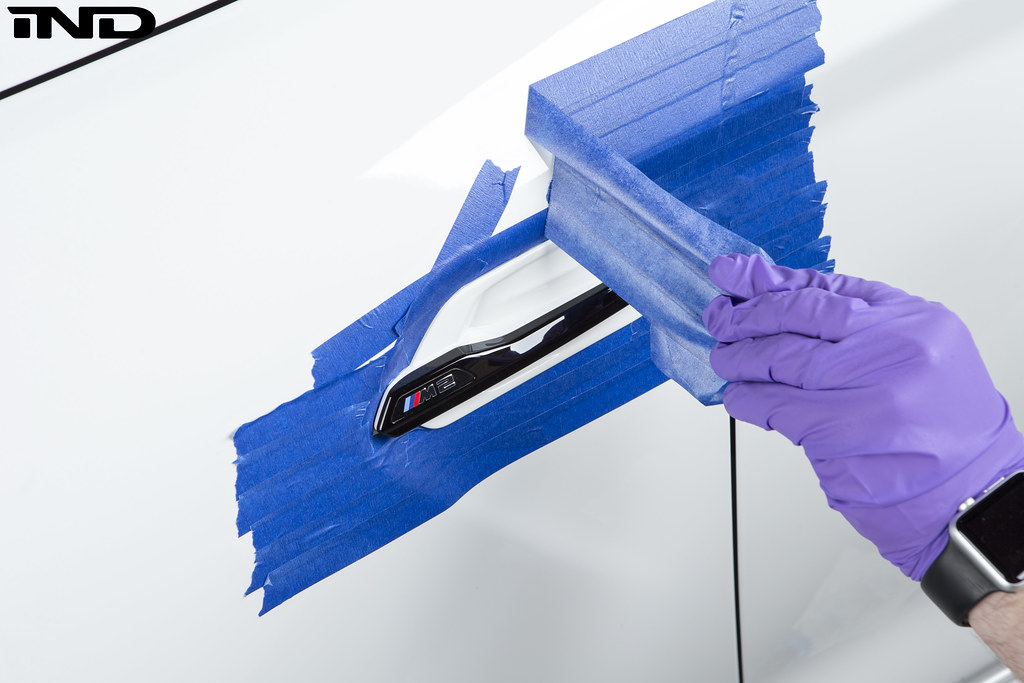 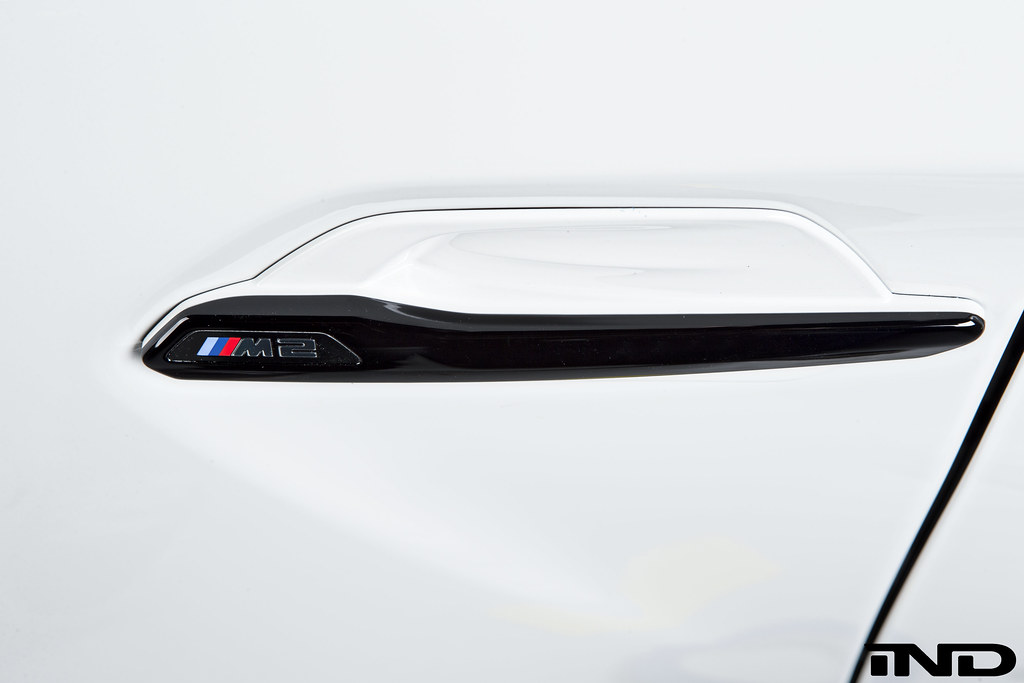 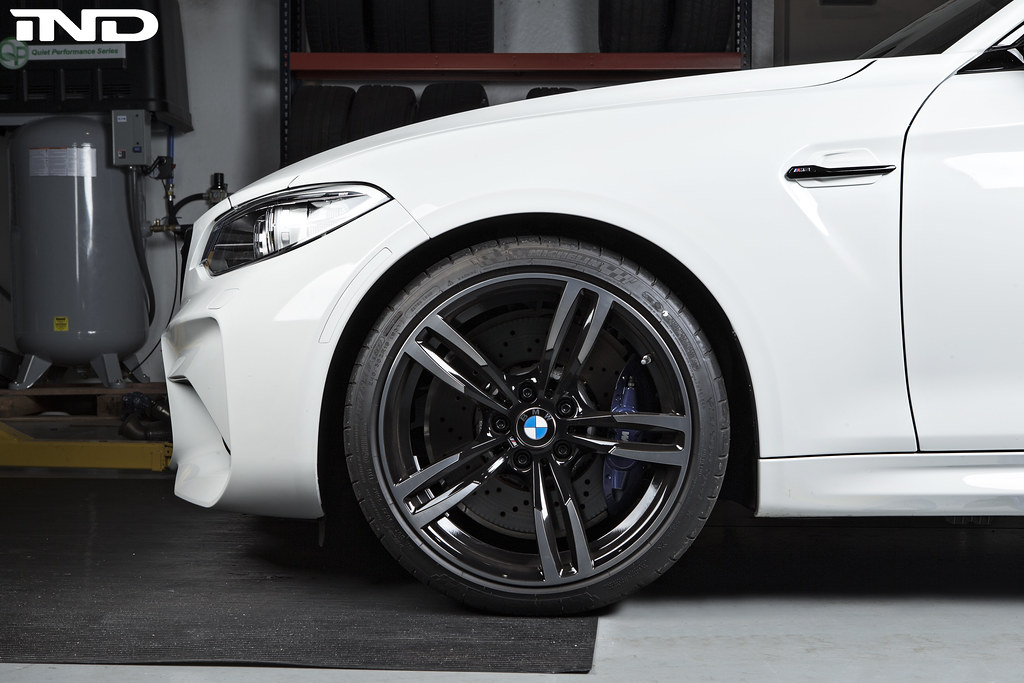
__________________
Last edited by Ryan@IND; 01-11-2018 at 02:25 PM.. |
| 04-27-2016, 02:59 PM | #2 |
|
Colonel

2274
Rep 2,523
Posts |
Can't wait to see the carbons
__________________
?16 M2 Long Beach Blue/Black, 6MT
'22 X5 4.0 M Sport Black Sapphire/Tartufo ?22 Tesla Model Y Performance Midnight Silver/White |
|
Appreciate
0
|
| 04-27-2016, 05:11 PM | #5 |
|
Second Lieutenant
 
136
Rep 247
Posts |
Ever tried dental floss to 'cut' through adhesive rather than using pry tool?
Used on badges before and it works great and no chance of damage. |
|
Appreciate
1
|
| 04-28-2016, 01:50 PM | #6 | |
|
Colonel

1823
Rep 2,948
Posts |
Quote:
|
|
|
Appreciate
0
|
| 05-24-2016, 07:23 PM | #7 |
|
Major
 
827
Rep 1,287
Posts |
is it necessary to apply that much painter's tape surrounding the side grill? Or can I just put enough to surround each corner?
Last edited by AWF87M2; 05-24-2016 at 08:37 PM.. |
|
Appreciate
0
|
| 05-24-2016, 08:41 PM | #8 |
|
Lieutenant Colonel
 
657
Rep 1,922
Posts
Drives: 2011 e91
Join Date: Jan 2013
Location: Calgary, AB, Canada
|
The problem with fishing line or floss here is that there's a lot of metal shaping around where they put these gills. If the surface was flatter, it would definitely work better. I know I'll try floss first, but there's nothing wrong with a smooth, nylon prying tool.
Another trick is to spray a bit of WD-40 instead of using painter's tape, the tool will slide more easily and won't scratch unless you're truly a Jeremy Clarkson ape type.
__________________
2011 E91
2016 M2 - Sold 2014 X1 - Sold 2002 Land Rover Discovery II - 3" lift & 33s |
|
Appreciate
0
|
| 05-24-2016, 09:43 PM | #9 | |
|
Private
 52
Rep 69
Posts |
Quote:
|
|
|
Appreciate
0
|
| 10-01-2017, 10:36 PM | #10 |
|
Major
732
Rep 1,314
Posts |
How about this carbon piece? Sorry about the bad quality photo.
|
|
Appreciate
1
IND-Distribution9586.50 |
| 10-03-2017, 03:02 PM | #11 | |
|
BimmerPost Supporting Vendor
9587
Rep 10,877
Posts  |
Quote:
Similar install, very easy. Thank you for the photo of the IND Carbon Side Grilles. The car looked great in person. 
__________________
|
|
|
Appreciate
0
|
| 10-22-2017, 04:00 PM | #12 |
|
Brigadier General
 
2354
Rep 4,254
Posts |
wow easy install. Loving the black chrome.
__________________
///M Power
|
|
Appreciate
1
IND-Distribution9586.50 |
| 10-22-2017, 06:45 PM | #14 | ||
|
Brigadier General
2354
Rep 4,254
Posts |
Quote:
__________________
///M Power
|
||
|
Appreciate
1
IND-Distribution9586.50 |
| 02-12-2018, 05:28 AM | #17 |
|
Private First Class

42
Rep 137
Posts |
I got some of these from another company - sorry IND! But I believe they are the same as the carbon ones you do - just posted from the UK so worked out much more cost effective.
They don't come with any sort of adhesive applied. Do I need some? Double sided tape? The one in your pics seems a sort of thick putty. I also note that you removed the chrome stripe first on the originals, then removed the rest - but when refitting, you fitted the new ones all as one piece? EDIT: Ah I see in your video it was removed as one piece |
|
Appreciate
0
|
| 02-12-2018, 06:52 AM | #18 | |
|
Brigadier General
1836
Rep 4,203
Posts |
Quote:
|
|
|
Appreciate
0
|
| 02-12-2018, 08:57 AM | #19 | |
|
Private First Class
42
Rep 137
Posts |
Quote:
I have some Harris foam number plate tape which is SOLID but it is 4mm thick I've found this which looks about 2/3mm to be fair... https://www.ebay.co.uk/itm/3M-x4-6-1...e6eJO2QgOlev-g Not sure, what do you think about the Harris one that I already have? http://www.halfords.com/motoring/pai...e-tape-12mmx4m |
|
|
Appreciate
0
|
| 02-12-2018, 09:24 AM | #20 |
|
Private First Class
42
Rep 137
Posts |
Will probably buy this if it is the right one?
Will arrive next day meaning I can get them on soon  https://www.amazon.co.uk/3M-Acrylic-...76%3A419158031 |
|
Appreciate
0
|
| 02-12-2018, 03:10 PM | #21 |
|
Brigadier General
1836
Rep 4,203
Posts |
I am pretty sure the 6mm is what was on mine like your link
https://www.ebay.co.uk/itm/3M-x4-6-1...e6eJO2QgOlev-g |
|
Appreciate
1
azibux142.00 |
| 02-13-2018, 02:01 AM | #22 | |
|
Private First Class
42
Rep 137
Posts |
Quote:
|
|
|
Appreciate
0
|
Post Reply |
| Bookmarks |
|
|


