| 03-14-2017, 10:50 PM | #551 |
|
Second Lieutenant
 292
Rep 254
Posts |
Just installed mine. No pics necessary since there are already good ones on this thread (slatted on AW). I left the tires on and it took me 2 hours... I'm a very slow/careful person lol. 8mm for all screws, 15 torx for the one screw that connects the bumper to rear fender. Really it was pretty easy. I'd give it a 2 outa 5. Only real tip is you will want to start with the top clip on the rear reflector and work your way down. Light prying on the outside while pinching and pushing from behind is the key. Quality and fitment is top notch. Looks good!
Thank you Acexxon !
__________________
2017 M2 - AW DCT - BM3 93 oct, Pure Stage 2, FBO, happy
 2013 BRZ - was a GREAT car... just not fast enough 2008 VW GTI - first experience with boost 97 Integra GSR - crashed it |
|
Appreciate
1
Acexxon639.00 |
| 03-15-2017, 12:53 AM | #552 |
|
Captain
639
Rep 665
Posts |
Hi guys, this is totally off topic, but I figured that there are a lot more people following this post than:
http://f87.bimmerpost.com/forums/sho...1320217&page=2 I have basically all the costs calculated, but there's one thing maybe the community can help me out with... Does anyone know if BMW have a design patent for this M3/M4 side mirror? It looks like they have put design patent on several of the side mirror designs!! I can't seem to find patent information on the M3/M4 one though... IF there's no design patent attached, then I'll be able to come up with a prototype in about 45 days... |
| 03-15-2017, 08:51 AM | #554 | |
|
Major General
 
4449
Rep 7,594
Posts
Drives: '19 M2C
Join Date: Jun 2007
Location: Chicagoland
|
Quote:
__________________
www.ReTuneTheDeTune.com
2019 M2 Competition (Sunset Orange) |
|
|
Appreciate
0
|
| 03-15-2017, 10:24 AM | #556 | |
|
Private First Class
 
164
Rep 181
Posts |
Quote:
|
|
|
Appreciate
0
|
| 03-15-2017, 12:17 PM | #557 |
|
BimmerPost Supporting Vendor
2868
Rep 11,374
Posts  |
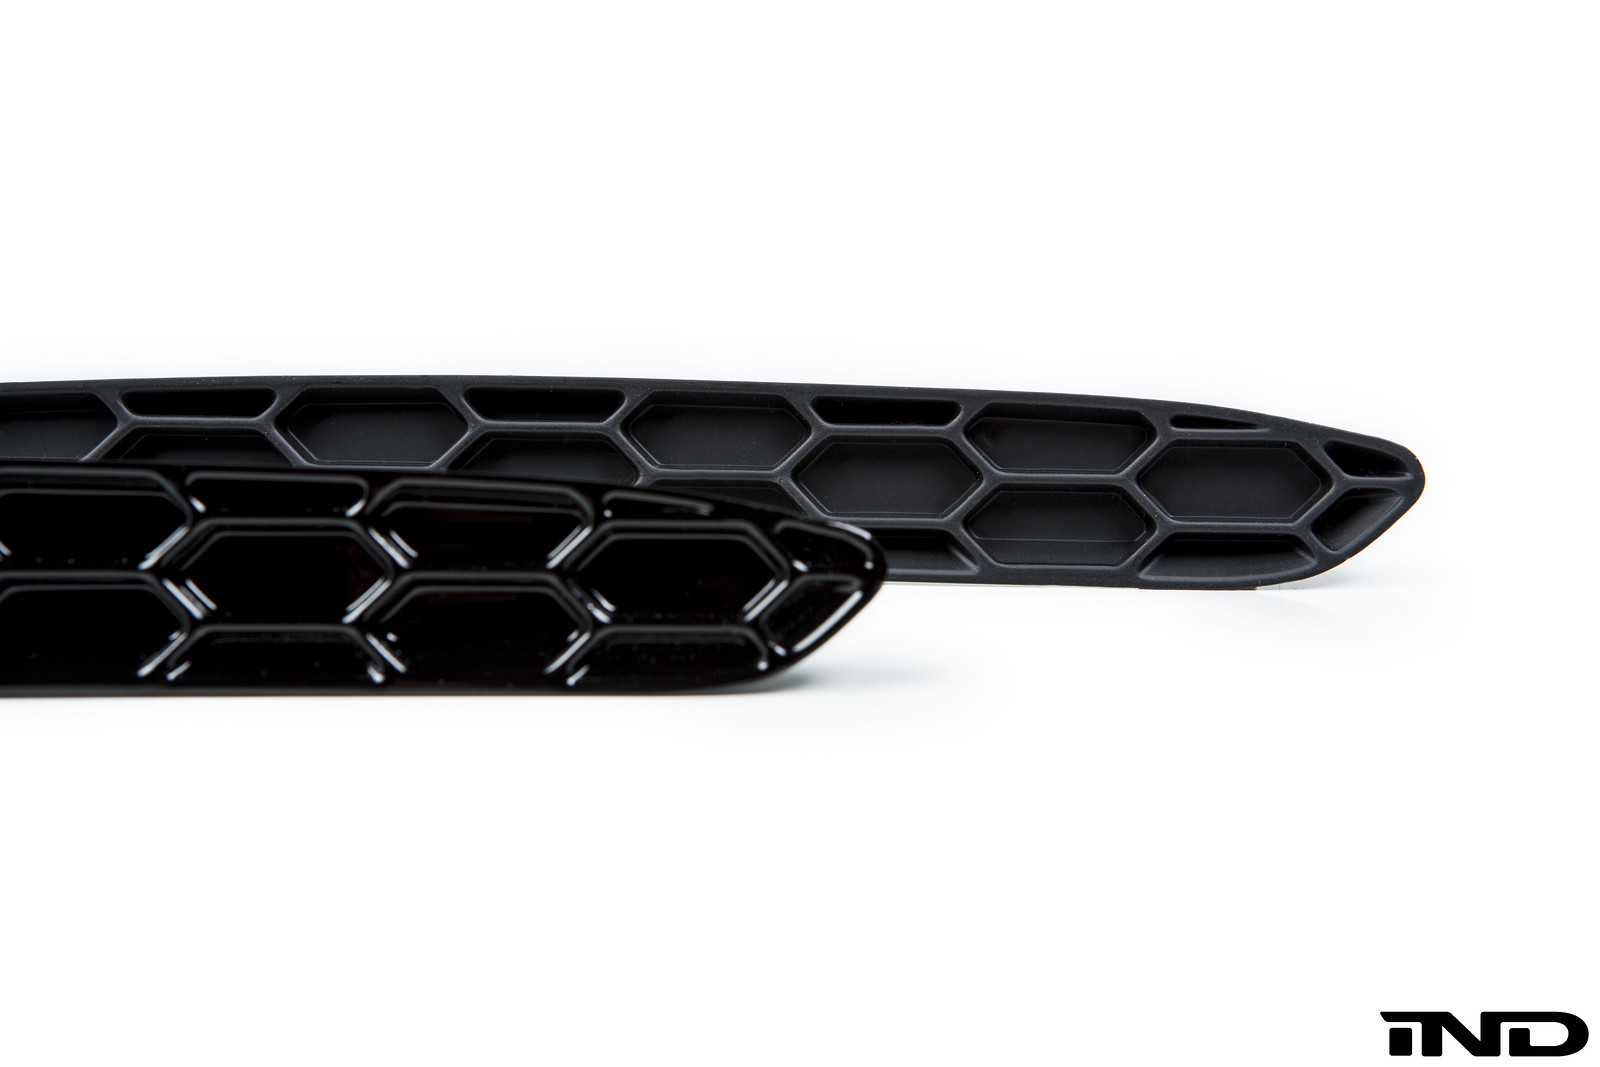
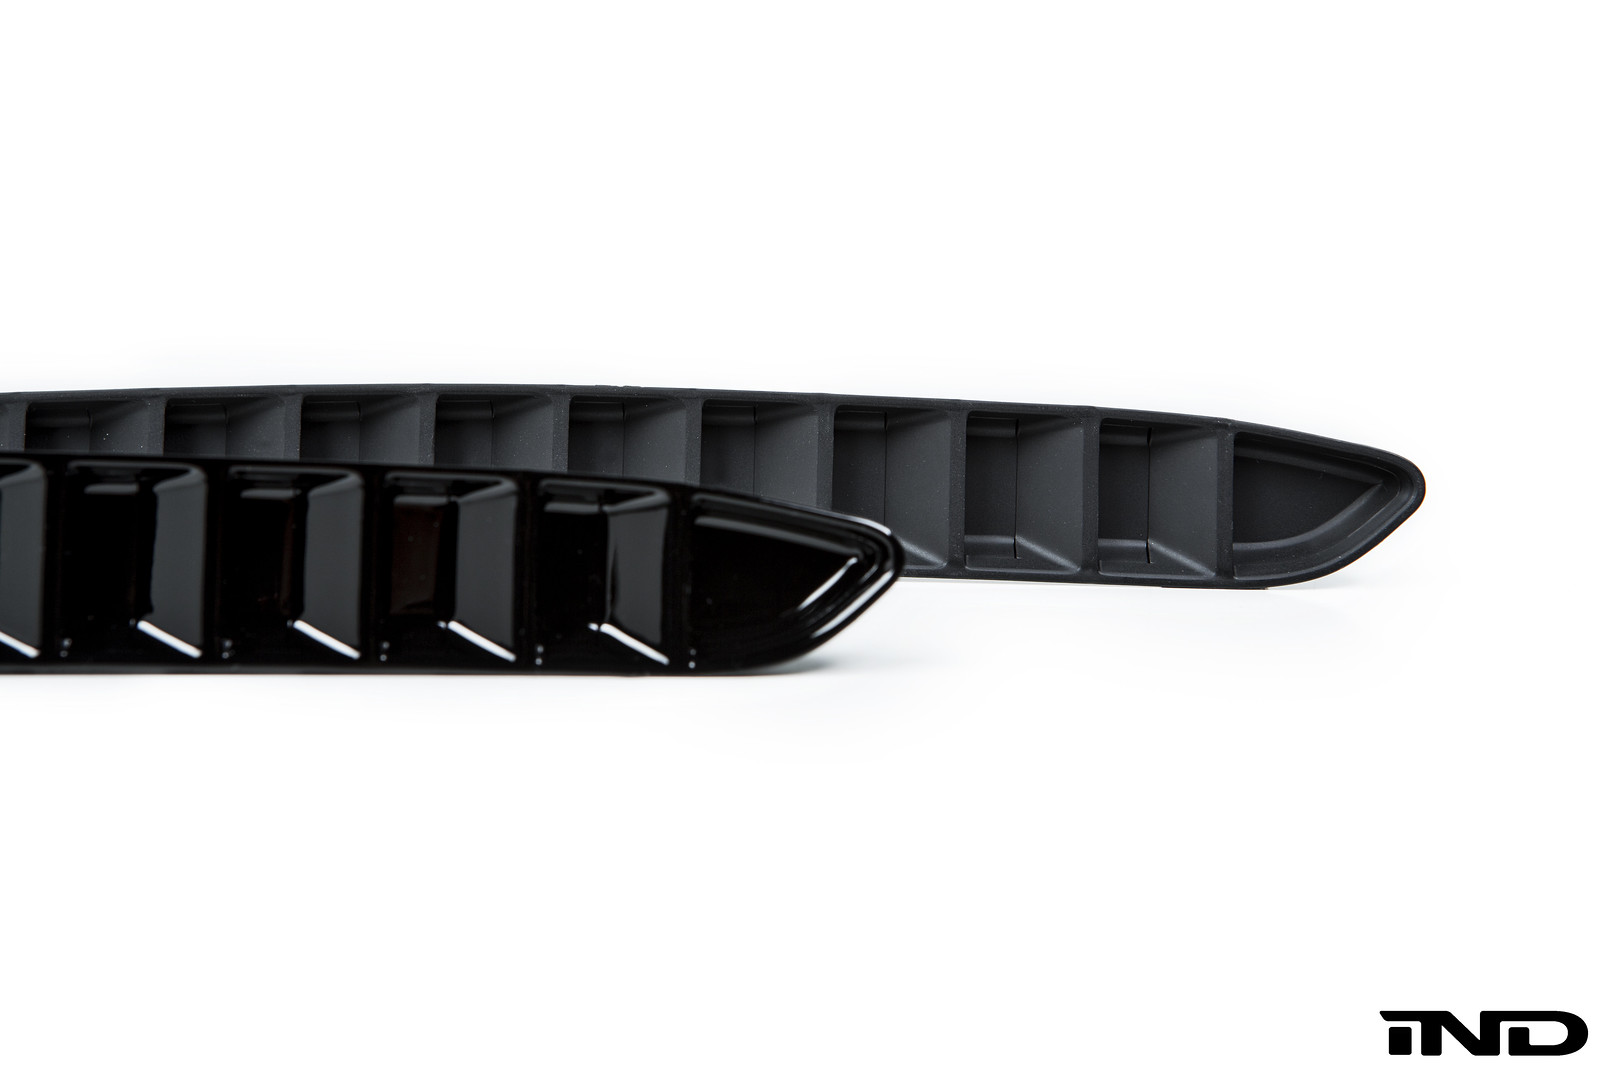
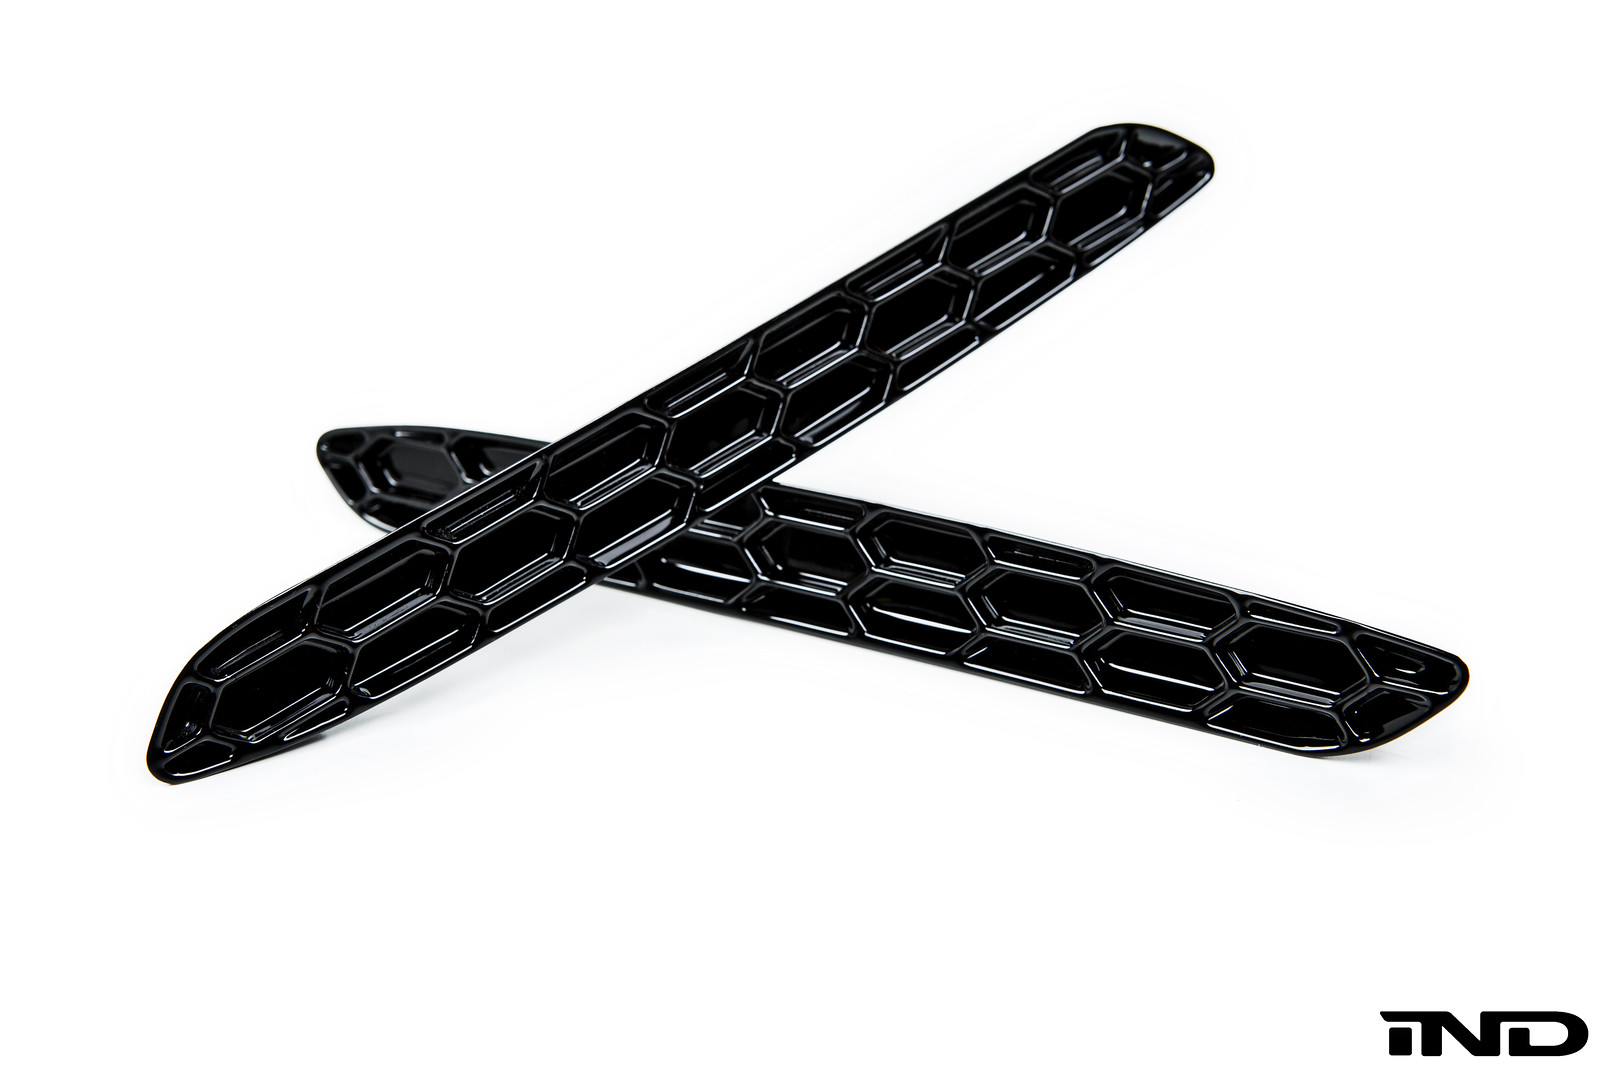
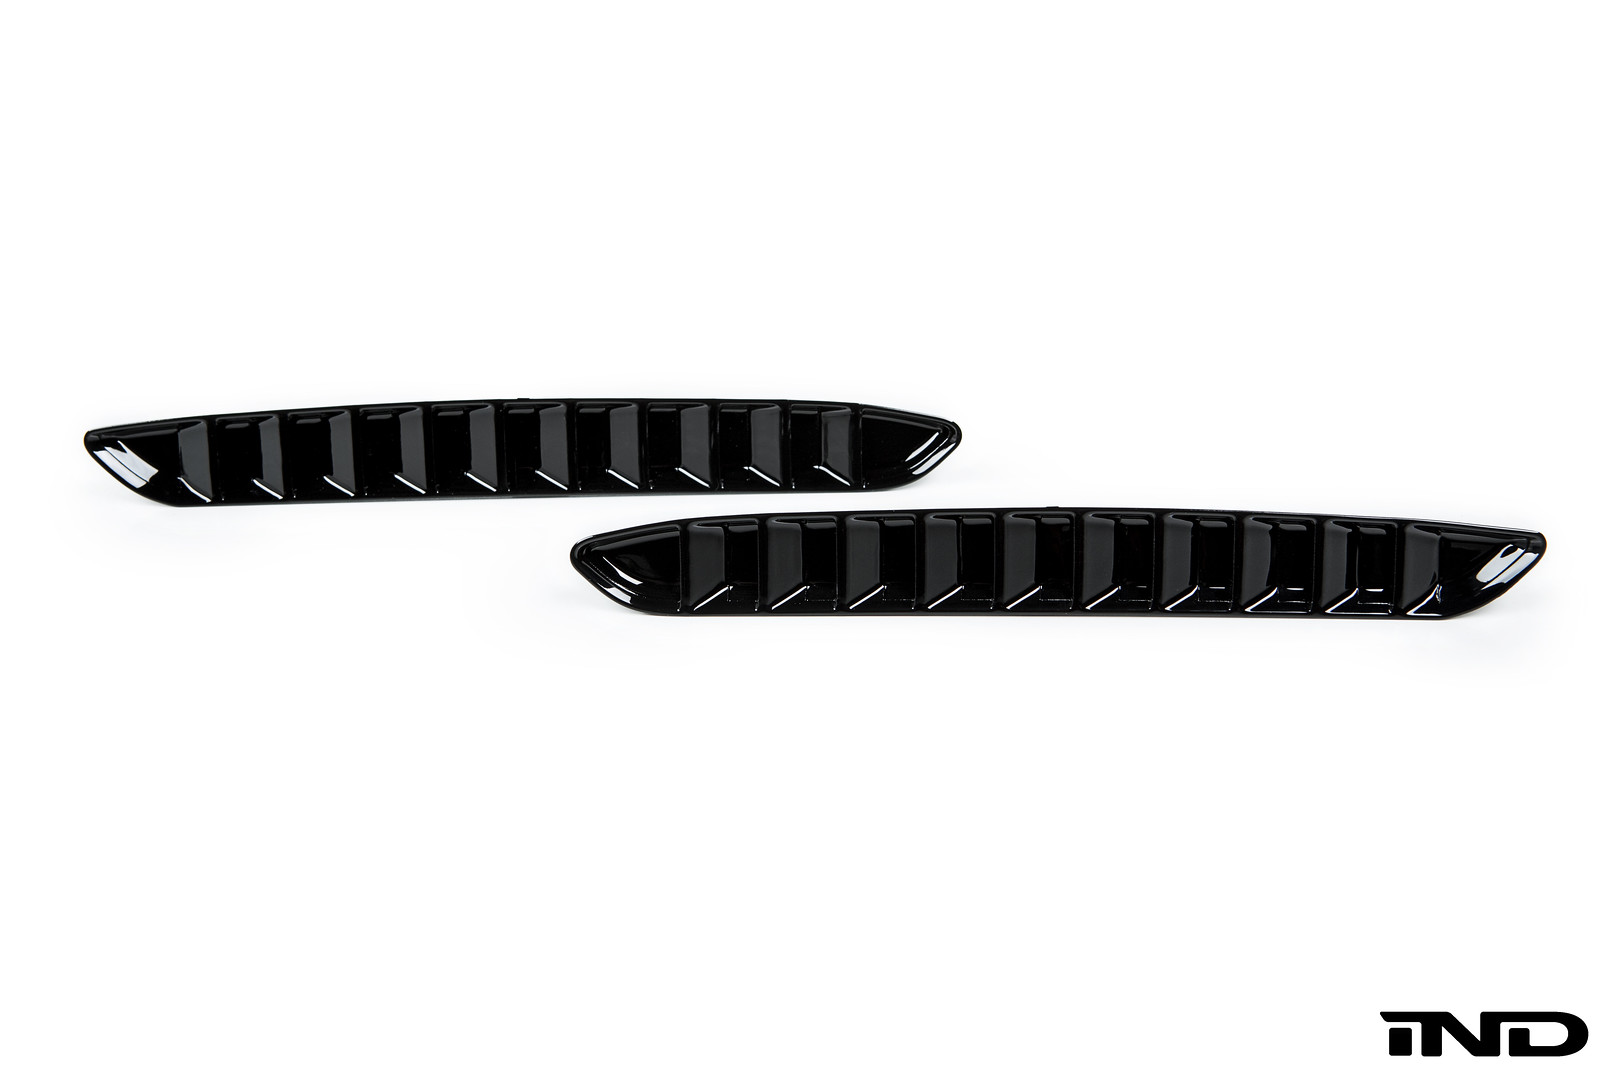
We now have the Gloss black reflector kits in stock. Here are some photos showing matte black vs. Gloss black.
__________________
|
| 03-15-2017, 06:08 PM | #558 | |
|
Lieutenant
283
Rep 399
Posts
Drives: 2017 BMW M2 6MT
Join Date: Apr 2016
Location: Toronto
|
Quote:

__________________
'17 BMW M2 LBB 6MT MPE
'13 BMW 335i Estoril Blue - sold |
|
|
Appreciate
0
|
| 03-15-2017, 10:06 PM | #560 | |
|
Second Lieutenant
117
Rep 220
Posts |
Quote:
 Any chance you're going to post the video by the weekend? If not, can you PM me the raw file you offered up to the other chap? |
|
|
Appreciate
0
|
| 03-16-2017, 01:09 AM | #561 |
|
Private First Class
87
Rep 95
Posts |
Not really a how-to, but I hope this helps!
 This is why I can never do body work... A couple notes: * If you have large limbs or hands, this will probably be a bit difficult. I'm a big guy, 6'5" (77 inches), and the entire process was a royal pain in the arse! The video is edited of course, but the rear-right side took me nearly 2 hours to complete. It took me awhile to figure out how to approach it exactly, and I wanted to be careful not to scratch, crack, or damage the bumper in any way. * The bumper itself is actually attached to a mounting bracket if you will. You have to loosen and remove the screws on the underside of the bumper in order to pull the bumper far enough away from the bracket to get your arm back there -in between the bracket and the bumper itself. Even still, I had to use long pliers to compress the three retaining clips on the back of the reflector (blind, I might add) while simultaneously prying from the front, trying to ensure that I didn't scratch the bumper. * I found it helpful to also remove an additional screw from the under-side of the bumper toward the rear, next to the exhaust. There are the two screws that Acexxon points out in his pictures, but this one is closer to the exhaust tips. This will enable the bumper to separate a little bit more if you need the room. * It might help to have a buddy to help hold the bumper so you can concentrate on compressing the clips and getting those damned things outta there. * I HIGHLY recommend removing the tire first. There's no way my big ass hands and arms would have been able to reach back there without removing the tire first. * To top retaining tabs on both reflector sets were quite snug, even moreseo than the other 2 tabs. When I snapped the new set in, the bottom and middle tabs snapped right in, but I had to use a hammer and dolly to gently tap the top tab in place. Even still, it didn't really "snap in" like the other two tabs. You'll also notice to top tab is more difficult to compress and remove -at least it was for me. * There was a learning curve with the first side, but the second side went much quicker and only took about 40 minutes. I could probably do it again in 30 minutes if I had to do it over. None of the aforementioned challenges are any discredit to the quality of Acexxon's product. It's very light -and made of ABS plastic I'm assuming, but feels durable, and the fittament was perfectly snug especially with the foam stickies attached. Packaging was also very nice! Thanks Acexxon!
__________________
2017 f87 ///M2, LBB, 6MT
2002 e46 325xi  @bimmer_joe @bimmer_joeLast edited by QLAbot; 03-16-2017 at 01:31 AM.. |
| 03-16-2017, 08:25 AM | #562 | ||
|
Meh
926
Rep 781
Posts
Drives: M3CS & Cayman S
Join Date: Jul 2008
Location: Cali
|
Quote:
|
||
|
Appreciate
1
Prodigy.697.50 |
| 03-16-2017, 10:17 AM | #563 | |
|
Private First Class
164
Rep 181
Posts |
Quote:
|
|
|
Appreciate
0
|
| 03-17-2017, 02:05 AM | #564 |
|
Meh
926
Rep 781
Posts
Drives: M3CS & Cayman S
Join Date: Jul 2008
Location: Cali
|
ok - here's my DIY video
|
|
Appreciate
17
|
| 03-17-2017, 05:46 AM | #566 | |
|
Captain
581
Rep 844
Posts |
Quote:
|
|
|
Appreciate
2
Norcalmav23292.00 nd2002178.50 |
| 03-17-2017, 09:48 AM | #567 | |
|
Lieutenant
283
Rep 399
Posts
Drives: 2017 BMW M2 6MT
Join Date: Apr 2016
Location: Toronto
|
Quote:
__________________
'17 BMW M2 LBB 6MT MPE
'13 BMW 335i Estoril Blue - sold |
|
|
Appreciate
0
|
| 03-17-2017, 03:14 PM | #568 |
|
Captain
639
Rep 665
Posts |
WOW! UltraMagneticAL & QLAbot you guys are awesome!
Next time when I make something, I should hire you guys to make DIY videos! Thanks!! |
|
Appreciate
2
UltraMagneticAL925.50 QLAbot87.00 |
| 03-17-2017, 03:15 PM | #569 | |
|
Captain
639
Rep 665
Posts |
Quote:
|
|
|
Appreciate
0
|
| 03-17-2017, 06:38 PM | #570 |
|
Second Lieutenant
117
Rep 220
Posts |
[QUOTE=UltraMagneticAL;21429436]ok - here's my DIY video
Fantastic! Thanks to both you UltraMagneticAL and QLAbot edit: just completed mine, no issues. slightly less than 2 hours from first tool in to last tool back. If I had every tool at hand and didn't struggle with the jacks, it would have been closer to an hour. Looks fantastic. I won't post pics because they're covered better above, but geez this looks good on white.... And a plug for @acexxon, great quality pieces. Last edited by CantComplain; 03-18-2017 at 03:00 PM.. Reason: updated |
|
Appreciate
3
|
| 03-21-2017, 11:09 AM | #571 |
|
Major General
4449
Rep 7,594
Posts
Drives: '19 M2C
Join Date: Jun 2007
Location: Chicagoland
|
The kit is in!!! Did it in 90 mins with the tires on. Just lifted the car slightly to get access. Great quality and fit!
I found a great tool to gently squeeze and release the tabs on the reflectors. See below. The reflector was out in ~20 seconds.
__________________
www.ReTuneTheDeTune.com
2019 M2 Competition (Sunset Orange) |
|
Appreciate
1
Acexxon639.00 |
| 03-21-2017, 12:37 PM | #572 | |
|
Private First Class
71
Rep 105
Posts |
Quote:
http://f87.bimmerpost.com/forums/sho....php?t=1363466 |
|
Post Reply |
| Bookmarks |
|
|


